
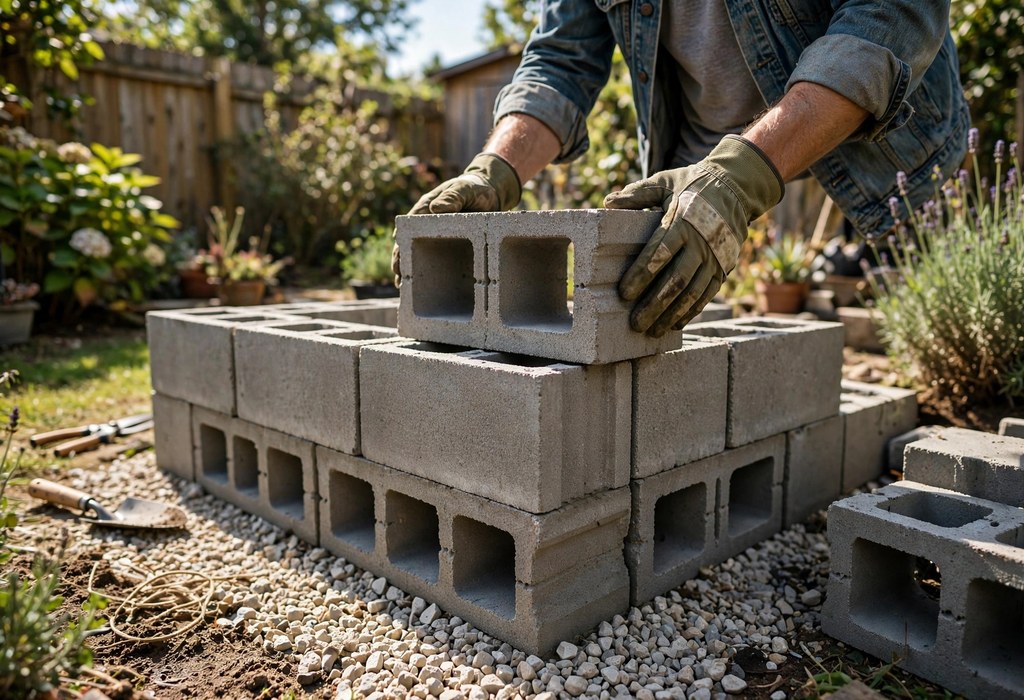
You can build a cinder block raised garden bed in one weekend with basic tools. The project needs careful siting, a level gravel base, and dry-stacked concrete blocks. This complete guide walks you through every step from planning to planting.
Raised beds solve poor soil, bad drainage, and back strain in one project. Cinder blocks add durability that wood simply cannot match over decades. Their hollow cores also double as bonus planters for herbs.
Below you will find the full step-by-step process in plain language. Each stage includes practical tips from experienced garden builders. Additionally, companion guides linked throughout cover tricky details like block counts and soil mixes in greater depth.
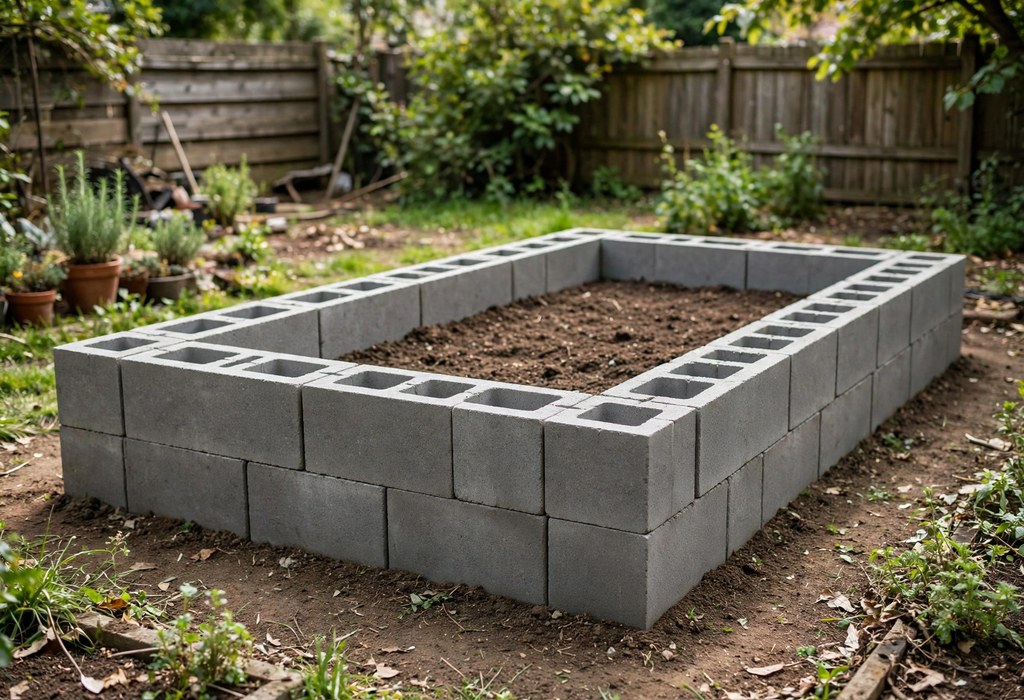
Why Choose Cinder Blocks for a Raised Bed
Concrete blocks outlast almost every wooden raised bed material available today. They shrug off rot, termites, and constant soil moisture without any treatment. A well-built block bed can therefore serve your garden for decades.
Blocks also bring valuable thermal mass to your growing space. They absorb daytime heat and release it slowly after sunset. This effect consequently extends your growing season at both ends.
The hollow cores double as mini planters for herbs and flowers. This bonus space supports companion planting right beside your vegetables. Furthermore, the wide top course gives you a handy seat for weeding.
Cost is another strong argument for concrete blocks. See cinder block raised bed vs. cedar raised bed before you buy materials. Plus, a basic block bed often costs less than a cedar equivalent.
Blocks suit gardeners who want a permanent, low-maintenance structure. They also need no staining, sealing, or board replacement. After that, they simply work year after year.
Renters and movers appreciate that dry-stacked blocks come apart easily. For example, you can dismantle the bed and rebuild it at a new home. Still, few other permanent materials offer that flexibility.
Blocks also resist fire, flood, and mower impacts. A stray bump chips paint on wood but barely marks concrete. This toughness keeps the bed looking sharp for years.
Paint or stucco transforms plain gray walls into garden features. Exterior masonry paint bonds well to clean concrete surfaces. A warm color makes the bed feel like intentional landscaping.
Community gardens favor blocks because plots change hands often. New gardeners inherit a sturdy structure with no learning curve. The bed simply keeps producing through every transition.
School and community gardens choose blocks for the same reasons. Volunteers build them in a single workday with basic tools. The result feeds neighborhoods for decades.
Plan Your Bed: Size, Site, and Layout
First, choose a bed size that fits your space and reach. A four-foot width lets most gardeners reach the center from either side. Keep beds under four feet wide unless you can access all sides.
Length matters less than width, so size it to your available space. For example, eight-foot beds are popular because the block math stays simple. Longer beds also need no extra skill, just more blocks and soil.
Standard sizes keep the block math simple for beginners. See how many cinder blocks do i need for a 4×8 raised bed for exact counts. It also covers less common sizes and taller walls.
Next, pick a site with six to eight hours of direct sun daily. In fact, most vegetables demand full sun to produce a strong harvest. Watch your yard through a day and note the shady spots.
Place the bed near a water source for easy irrigation. Hauling hoses across the yard gets old fast. Additionally, choose level ground or plan to cut into a gentle slope.
Leave two to three feet of clearance around every side. This gap gives your wheelbarrow and mower room to pass. Furthermore, good airflow around the bed reduces disease pressure on plants.
Mark the footprint with stakes and mason string before you dig. This simple outline reveals spacing problems early. Adjust the layout now while changes still cost nothing.
Also, consider sun angles across the growing season, not just today. A spot sunny in June may sit in shadow by September. Track light for a full day before you commit.
Finally, think about mature plant height when placing the bed. Tall tomatoes can shade neighboring beds or patios nearby. Position accordingly to keep every plant happy.
Sketch the bed on graph paper before buying anything. A simple drawing reveals awkward gaps and wasted space. This ten-minute exercise prevents expensive mistakes.
Check local rules if you garden in a rented home or HOA neighborhood. Some associations restrict structure height or visible materials. A quick question now avoids forced removal later.
Orient long beds north to south when possible. This layout gives both sides even sun exposure. East-to-west beds shade their own northern side.
Leave room for future beds beside the first one. Gardening enthusiasm grows faster than most beginners expect. Space now prevents cramped layouts later.
Choosing Safe Blocks for a Vegetable Garden
Most blocks sold today as cinder blocks are actually concrete masonry units. True cinder blocks used coal ash, but manufacturers switched to concrete decades ago. Today, modern CMU blocks contain cement, sand, and aggregate.
Older blocks sometimes contained fly ash, which worries gardeners. Many gardeners ask are cinder blocks safe for growing vegetables before buying blocks. That guide reviews current research and also suggests simple precautions like food-safe liners.
The terms confuse many first-time shoppers. Read cinder block vs. concrete block for raised beds to learn the real distinction. It also explains cinder, concrete, and CMU in plain terms.
For this build, choose standard 8x8x16-inch hollow concrete blocks. They stack neatly, and their cores also accept rebar pins. Avoid decorative or lightweight blocks with thin walls.
Inspect each block before loading it onto your truck. Also, reject cracked units and any with crumbling faces. Solid, uniform blocks build straighter walls with less fuss.
Instead, buy from a reputable masonry supplier rather than unknown salvage piles. New blocks bring consistent dimensions and known materials. This consistency makes stacking far easier.
If you still feel cautious, line the interior walls with heavy-duty plastic sheeting. The liner blocks direct soil-to-block contact completely. Replace it every few years as needed.
Ask your supplier whether blocks meet current ASTM standards. Certified blocks come from controlled manufacturing processes. This label offers extra confidence for food growing.
Tools and Materials Checklist
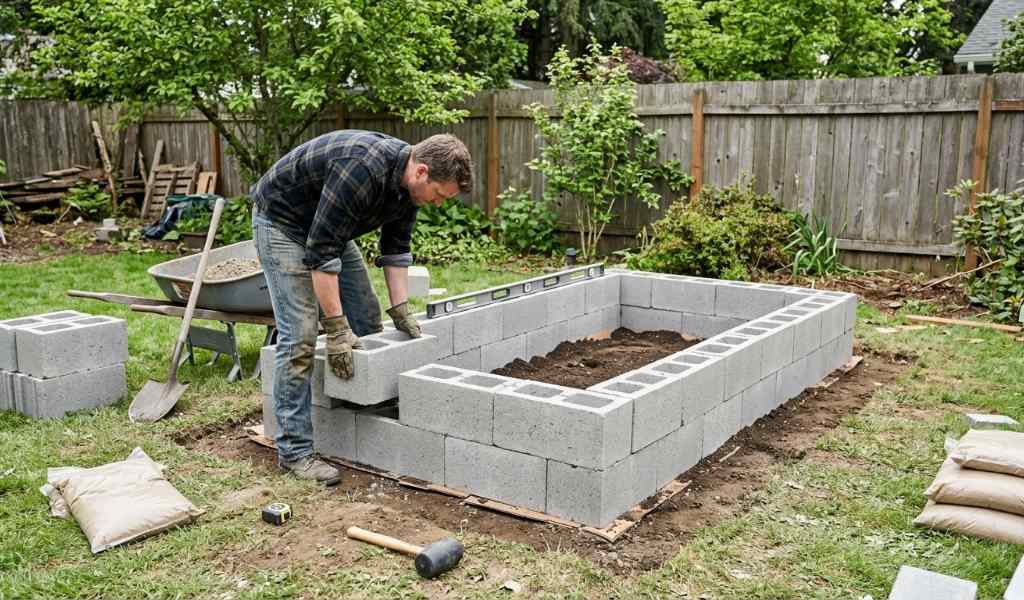
Gather everything before you break ground on the project. One supply run beats five mid-project trips to the store. Furthermore, dry weather makes the whole build easier.
Borrow specialty tools like plate compactors when possible. Neighbors and rental yards both beat buying single-use equipment. Smart budgeting leaves more for quality soil.
-
Concrete Blocks: Buy standard 8x8x16-inch hollow units for the full wall height. Also grab a few extras for mistakes and cuts.
-
Crushed Gravel: Get enough for a three-inch-deep base under the entire footprint. Then add a little extra for low spots.
-
Landscape Fabric: Lay it under the gravel to block weeds from below.
-
Rebar Pins: Cut half-inch rebar into two-foot lengths for wall reinforcement. Space them every two to three feet.
-
Cap Blocks: Top the walls with flat caps for a finished seat edge.
-
Shovel and Rake: Dig the footprint and spread gravel evenly.
-
Hand Tamper: Compact the gravel base until it feels rock solid. Then recheck the level in both directions.
-
Four-Foot Level: Check every course for level in both directions.
-
Mason String and Stakes: Mark straight lines for the first course.
-
Rubber Mallet: Tap blocks into perfect alignment without cracking them. It also saves your hands during adjustments.
-
Wheelbarrow: Move gravel, soil, and compost with far less effort. It also hauls away sod and debris.
-
Tape Measure: Verify dimensions as you stack each new course.
-
Work Gloves: Protect your hands while lifting heavy concrete blocks.
-
Stiff Broom: Sweep soil off block faces for a tidy finish.
-
Garden Fork: Loosen native soil beneath the bed for better drainage.
-
Hose With Sprayer: Settle fresh soil and water new plantings deeply.
-
Carpenter’s Pencil: Mark cutting lines on blocks for partial units.
Cinder Block Raised Garden Bed Size Chart
The following table compares common raised garden bed sizes, estimated cinder block requirements, and soil capacity to help readers plan their projects.
| Garden Bed Size (L × W) | Height | Blocks Needed | Soil Volume | Best For |
|---|---|---|---|---|
| 4 × 2 ft | 8 inches | 10 | 5.3 cu ft | Herbs and flowers |
| 4 × 4 ft | 8 inches | 12 | 10.7 cu ft | Small vegetables |
| 6 × 3 ft | 8 inches | 16 | 12 cu ft | Lettuce and spinach |
| 8 × 4 ft | 8 inches | 18 | 21.3 cu ft | Mixed vegetables |
| 8 × 4 ft | 16 inches | 36 | 42.7 cu ft | Deep rooted vegetables |
| 10 × 4 ft | 16 inches | 42 | 53.3 cu ft | Larger vegetable gardens |
Step 1: Prepare and Level the Site
First, clear grass and weeds from the marked footprint. Slice sod away with a flat shovel and compost it elsewhere. Meanwhile, pull any deep roots that could push through later.
Next, dig down about four inches across the whole rectangle. This shallow trench will then hold your gravel base. Also, keep the depth consistent from corner to corner.
Then rough-level the trench bottom with a rake. It does not need perfection at this stage. The gravel layer will forgive small dips and bumps.
Check your work with the four-foot level in several spots. Shim low areas with a little extra soil. Additionally, confirm the rectangle corners sit square.
Lay landscape fabric across the excavated area now. Overlap seams by six inches to block persistent weeds. This barrier still lets water drain freely downward.
Some gardeners build directly on grass to save time. That shortcut invites weeds and settling problems within a season. A proper excavation instead pays off for years.
Finally, step back and sight along your string lines. Straight lines now mean straight walls later. Adjust stakes until the outline looks crisp.
Remove any buried debris you uncover while digging. Old roots, rocks, and trash all undermine a stable base. A clean trench therefore builds a better bed.
Save the excavated sod for compost or patching bare lawn spots. Nothing from this project needs to go to waste. This habit furthermore keeps project costs down.
Call your local utility line service before digging deeper than six inches. Buried cables and pipes hide in surprising places. This free call prevents dangerous and expensive accidents.
Photograph the leveled trench for your garden journal. Future you will appreciate the reference when troubleshooting. Good documentation turns guesswork into knowledge.
Step 2: Build a Solid Gravel Base
First, spread crushed gravel two to three inches deep over the fabric. Rake it roughly level across the whole footprint. This base drains water away from the block bottoms.
Then tamp the gravel firmly with a hand tamper. Work in overlapping passes until the surface feels solid underfoot. Consequently, the blocks will sit on a stable, non-shifting platform.
Next, check the level again in both directions. Add or remove gravel to fix any high or low spots. Precision here prevents leaning walls later.
Extend the gravel a few inches beyond the block footprint. This apron sheds rainwater away from the wall base. Furthermore, it discourages weeds from creeping under the first course.
In cold climates, build a deeper base to fight frost heave. Six inches of compacted gravel handles most freeze-thaw cycles. Meanwhile, the drainage it provides protects the wall year-round.
Do not substitute sand for crushed gravel here. Sand washes out and shifts under heavy loads. Crushed stone instead locks together and stays put.
A plate compactor speeds the job on large beds. Rental yards offer them for a modest half-day fee. Hand tamping still works fine for a single small bed.
Mist the gravel lightly before the final tamping pass. Slight moisture helps the stones settle tighter together. Do not soak the base into mud, however.
Walk the base after tamping to feel for soft spots. Your feet detect inconsistencies that eyes miss easily. Fix any spongy areas with more gravel and tamping.
Save leftover gravel for the block cores or pathways. A small pile beside the bed proves useful later. Smart builders waste nothing on site.
Step 3: Dry-Stack the Block Courses
First, set the first course directly on the leveled gravel. Place blocks end to end with tight joints. Check each block with the level as you go.
Next, tap blocks into alignment with the rubber mallet. Small adjustments now prevent big problems later. Meanwhile, keep the outer faces flush for a clean look.
Then stagger the joints on the second course like brickwork. This running bond pattern locks the wall together firmly. You need no mortar when joints overlap properly.
Dry stacking feels strange until you try it. New to mortarless building? Read how to build a cinder block raised bed without mortar for the full technique. It also covers joint staggering, corners, and beginner mistakes.
Stack two courses for a comfortable sixteen-inch working height. Three courses also suit gardeners who want deeper soil or easier access. Taller walls need extra reinforcement, so plan accordingly.
Keep every course level in both directions. A tilted second course magnifies into a leaning wall. Additionally, recheck the corners for square after each course.
Finally, drive rebar pins through the block cores and into the ground. Space pins every two to three feet along the walls. These pins anchor the stack against frost heave and bumps.
Finish the top with flat cap blocks for a clean edge. Caps also give you a comfortable perch while tending plants. They complete the professional look of the bed.
Also, work from the corners inward on each course. Corners set the alignment for everything between them. This habit produces noticeably straighter walls.
Keep a bucket of gravel handy while stacking. Small shims of gravel fine-tune any block that sits slightly low. Shimming, moreover, beats lifting and resetting heavy blocks.
Pause after the first course and admire your straight lines. This checkpoint catches alignment errors before they compound. Fixing one course beats rebuilding two.
Recruit a helper for the second course if possible. An extra pair of hands speeds placement considerably. Teamwork also makes heavy lifting safer.
Step 4: Lock the Walls Against Shifting
Soil pressure pushes outward on every raised bed wall. Two courses of block handle this force well when built correctly. Ultimately, good preparation matters more than extra height.
The rebar pins from step three do most of the stabilizing work. They tie the courses together and anchor them underground. Additionally, staggered joints spread loads across the whole wall.
Then backfill soil against the outside base of the walls. This soil buttress also resists outward pressure at the weakest point. Tamp it gently to avoid pushing blocks inward.
Good habits prevent most wall problems. Read how to keep a cinder block raised bed from shifting or leaning for anti-shift details. It also covers drainage fixes, pin spacing, and repairs for leaning walls.
Avoid piling heavy soil against one side during filling. Fill evenly from the center outward instead. Balanced loading keeps every course exactly where you set it.
Check wall plumb once a year with your level. Catching a slight lean early makes correction easy. Furthermore, prompt fixes protect the whole structure.
Never stack blocks higher than three courses without engineering advice. Taller walls face serious soil pressure from the fill. Instead, stay within safe limits for a home garden.
Corner blocks deserve extra attention during backfilling. These joints concentrate the outward forces of the whole wall. Therefore, pack soil firmly but evenly around them.
Resist the urge to rush the backfilling step. Hasty shoveling knocks courses out of alignment quickly. Slow, even work protects your leveling efforts.
Mark pin locations with small flags during construction. Visible markers prevent accidental strikes with shovels later. This simple habit saves bent rebar.
Step 5: Fill With the Right Soil Mix
Never fill a raised bed with pure garden soil from your yard. Native soil also compacts and drains poorly in a confined bed. Instead, a blended mix grows far healthier plants.
A proven recipe combines topsoil, compost, and aeration materials. Compost feeds plants while perlite or vermiculite keeps the mix fluffy. Moreover, this balance holds moisture without waterlogging tender roots.
Ratios matter more than brand names here. See best soil mix for a cinder block raised vegetable bed for exact ratios and tips. That guide also breaks down budget mixes and premium blends.
Then fill the bed in layers, watering each one lightly. This technique settles the mix and reveals low spots early. Top up the final layer after a day or two.
Leave one to two inches of headroom below the top course. This lip keeps soil and mulch from washing out. Additionally, it gives you room to water without overflow.
Expect the soil level to drop during the first season. Organic matter breaks down and settles naturally over time. Therefore, top up with fresh compost each spring.
Finally, test soil pH with an inexpensive kit before planting. Most vegetables thrive between 6.0 and 7.0. Amend with lime or sulfur according to the results.
Buy soil ingredients in bulk to save serious money. Bagged mixes cost several times more per cubic foot. For example, local suppliers deliver full loads at bulk prices.
Screen out large sticks and clumps as you fill. Otherwise, big debris creates air pockets that later collapse. A quick pass with a garden fork breaks them up.
Moisten each layer lightly as you fill the bed. Damp soil settles faster than dry soil does. This trick reduces the waiting time before planting.
Keep a little extra mix piled beside the bed. You will need it for topping up settled spots. Running short mid-project wastes a whole afternoon.
Step 6: Put the Block Holes to Work
Those hollow cores are bonus growing space, not wasted space. Each hole also holds enough soil for herbs, flowers, or small greens. Therefore, smart gardeners plant every one of them.
Fill the cores with the same soil mix you used in the bed. Tamp it lightly so plants sit at the right depth. Then choose plants that match each hole’s sun exposure.
Each option suits a different goal. Read how to fill cinder block holes to compare all three options. It also shows the best planting combinations.
Herbs like thyme, oregano, and chives thrive in the confined cores. Their roots stay contained and their foliage spills attractively. Additionally, they sit within easy reach for cooking.
Marigolds and nasturtiums make excellent core companions for vegetables. For example, marigolds attract pollinators and nasturtiums repel certain pests. This pairing shows companion planting at its most space-efficient.
In cold regions, fill unused cores with gravel instead of soil. This prevents trapped water from freezing and cracking blocks. Meanwhile, planted cores need winter mulch for root protection.
Label herb cores with small plant markers. Markers prevent confusion when seedlings look alike. They also add a charming organized look.
Therefore, rotate core plantings each season like the main bed. Rotation disrupts pest and disease cycles effectively. Even small spaces benefit from this practice.
Water core plantings more often than the main bed. Small soil volumes dry out remarkably fast. A daily check keeps herbs happy.
Tuck trailing plants like thyme along the outer edges. Their foliage softens the hard concrete lines beautifully. Beauty and harvests grow together here.
Step 7: Plant and Water With Confidence
Wait until your soil settles before transplanting seedlings. A day or two of watering first firms the mix nicely. Then plant at the spacing your seed packets recommend.
Block walls warm the soil earlier than wooden beds do. As a result, this thermal boost lets you plant warm-season crops sooner. Meanwhile, cool-season greens thrive in the shoulder months.
Match varieties to your climate and sunlight. See best vegetables to grow in a cinder block raised bed for top performers in these beds. It also covers tomatoes, peppers, greens, and root crops.
Water deeply but less often to build strong roots. Shallow daily sprinkles create weak, thirsty plants. Instead, aim for one inch of water per week, adjusted for rain.
Mulch the surface with two to three inches of straw or shredded leaves. It locks in moisture and suppresses weeds effectively. Additionally, it feeds soil life as it breaks down.
Drip irrigation suits block beds especially well. Lines run neatly along the walls without disturbing plants. Furthermore, drip keeps foliage dry and reduces disease.
Watch new plantings closely during the first two weeks. Still, consistent moisture matters most while roots establish. After that, the deep soil mix does much of the work.
Thin seedlings to the spacing on the packet without mercy. Otherwise, crowded plants compete for light and nutrients. Ruthless thinning grows bigger harvests.
For example, sow new lettuce as earlier rows mature. Succession plant every two to three weeks for continuous harvests. This rhythm keeps the bed productive all season.
Harden off indoor seedlings before transplanting them outside. A week of gradual exposure prevents transplant shock. Skipping this step stunts young plants.
Record planting dates on your plant markers directly. Dates help you track days to maturity accurately. This data improves your timing every season.
Seasonal Maintenance for a Long-Lasting Bed
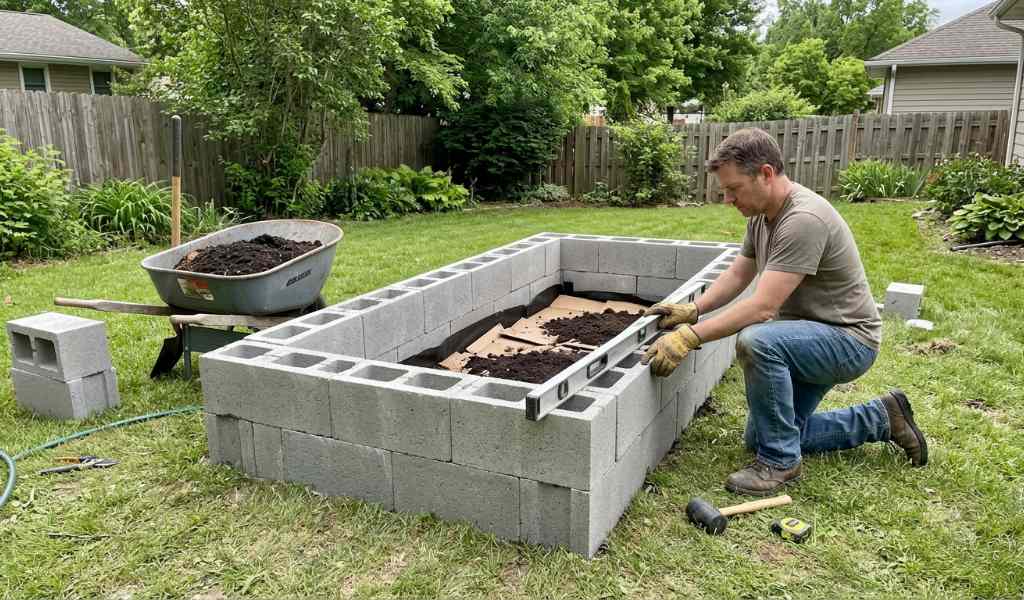
Spring prep starts with topping up settled soil. Next, add two inches of fresh compost and work it into the top layer. Consequently, this annual feeding replaces nutrients that last season consumed.
Inspect the block walls each spring for shifting or cracks. Reset any tilted blocks before filling the bed. Additionally, drive replacement rebar pins where old ones loosened.
Summer care centers on consistent watering and mulching. Therefore, check soil moisture two inches down before watering. Deep, infrequent watering beats daily sprinkles.
Fall is the time to protect your investment. Next, pull spent plants and add a thick layer of shredded leaves. This winter blanket feeds worms and prevents erosion.
In freezing climates, drain irrigation lines before the first hard freeze. Trapped water can crack both pipes and block cores. Meanwhile, empty rain barrels to prevent ice damage.
Every few years, test the soil and rebalance nutrients. For example, heavy feeders like tomatoes deplete specific minerals over time. A simple kit guides your amendments.
With this routine, your block bed will outlast wooden alternatives by decades. The structure itself needs almost no attention. Consequently, your effort goes where it belongs: the plants.
Keep a simple garden journal of what you planted and when. Moreover, notes on varieties and yields guide next year’s choices. Good records compound into better harvests.
Also, share extra harvests with neighbors to build goodwill. A productive bed often grows more than one household needs. Generosity grows gardens too.
Tighten any loose cap blocks each spring. Frost can nudge caps slightly out of place. A quick reset keeps the seating edge safe.
Refresh painted block walls every few years. Sun and rain gradually fade exterior coatings. A new coat keeps the bed looking intentional.
Mistakes to Avoid on Your First Build
Skipping the gravel base is the most common beginner mistake. Blocks set directly on soil settle unevenly within months. A proper base takes an hour and prevents years of frustration.
Forgetting to stagger joints weakens the entire wall. Aligned joints create straight vertical seams that split apart easily. Always offset each course like traditional brickwork.
Overfilling the bed wastes good soil mix unnecessarily. Soil above the top course washes out with the first heavy rain. Leave that crucial one-to-two-inch lip instead.
Using salvaged blocks of mixed sizes causes endless frustration. Uneven units refuse to stack level no matter your skill. Buy uniform blocks from one supplier for straight walls.
Neglecting drainage turns a raised bed into a soggy planter. Water must escape freely through the gravel base below. Otherwise, roots suffocate and walls slowly shift.
Planting before the soil settles buries seedlings too deep. Fresh fill drops several inches during the first weeks. Water thoroughly, wait a few days, then plant.
Ignoring the sun map leads to disappointing harvests later. A bed that looks sunny in spring may sit shaded by summer. Track sunlight across seasons before you build.
Building on a slope without terracing invites disaster. Gravity pulls soil and water downhill against the low wall. Level the site or step the bed properly.
Forgetting winter protection shortens the life of your soil. Bare soil erodes and loses nutrients to winter rains. A thick mulch layer prevents both problems.
Skipping the level check between courses compounds small errors. A slightly tilted first course becomes a leaning wall by course three. Check level constantly as you stack.
Filling with unamended topsoil starves hungry vegetables. Plain topsoil lacks the nutrients that compost provides freely. Blend amendments in from the start.
Frequently Asked Questions
How Deep Should a Cinder Block Raised Bed Be?
Sixteen inches, or two block courses, suits most vegetables perfectly.
Do Cinder Blocks Leach Chemicals Into the Soil?
Modern concrete blocks show minimal leaching, and a food-safe liner adds extra peace of mind.
Can You Build a Cinder Block Raised Bed on Grass?
You can, but excavating the sod and adding a gravel base prevents weeds and settling.
How Long Will a Cinder Block Raised Bed Last?
A well-built block bed easily lasts several decades with almost no maintenance.
Do You Need Mortar for a Cinder Block Raised Bed?
No, dry-stacking with staggered joints and rebar pins creates a strong, stable wall.
Conclusion
You now have the complete blueprint for a cinder block raised garden bed. From siting to planting, every step builds on the last. In short, this weekend project pays dividends for decades.
Start this weekend by marking your footprint and ordering blocks. Momentum beats perfection on a first build. Additionally, every linked guide above stands ready when you need deeper detail.
Finally, picture yourself harvesting tomatoes from a bed you built with your own hands. That satisfaction starts with a single leveled course. Grab your shovel and begin today.
Bookmark this guide and share it with a gardening friend. Moreover, building together makes the heavy work lighter. Your best growing seasons are ahead.


