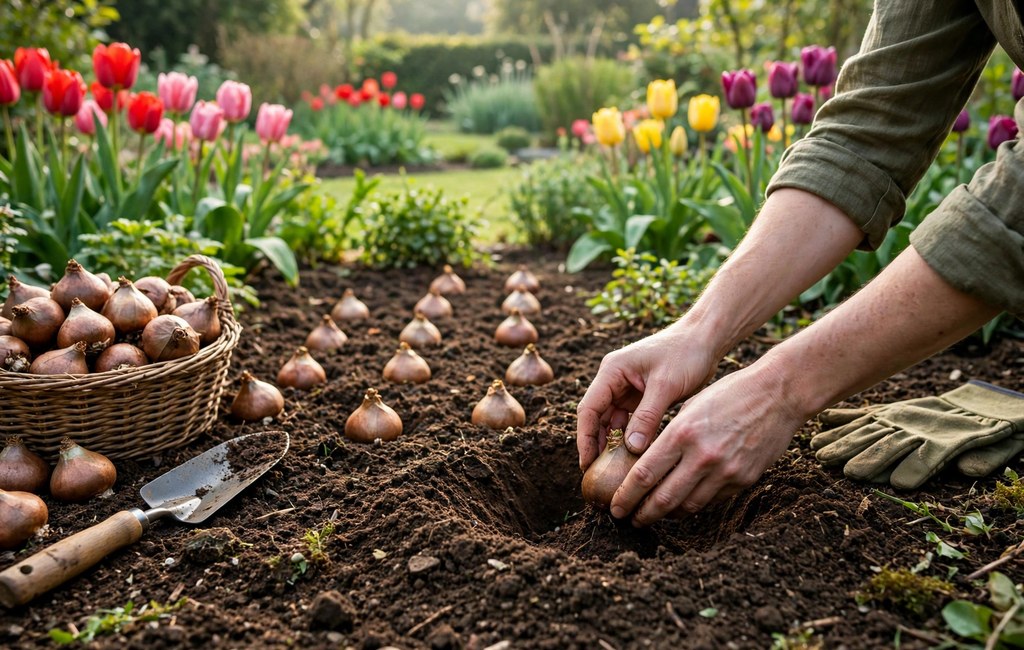
Plant tulip bulbs in fall, pointed end up, six to eight inches deep. First, learn the best time to start in your own climate. Then choose full sun and soil that drains freely after rain. Healthy bulbs and careful placement complete the recipe for spring success.
This guide walks through bulb selection, soil preparation, planting technique, and spring care. Also, each step explains the reasoning, not just the action required. In practice, simple choices in fall decide most of the spring display. By contrast, rushed planting often produces leaves without any flowers at all.
Understanding How a Tulip Bulb Grows
A tulip bulb works like a packed suitcase for the plant. Inside it sits the embryo flower, plus stored food for growth. In fact, the coming flower already exists before planting day. So fall planting protects a flower rather than creating one.
Roots grow first, quietly, while the soil stays cool and moist. Then the bulb rests through winter and gathers essential chilling. Once spring warmth arrives, the shoot pushes upward surprisingly quickly. Finally, leaves feed the bulb again after the flower fades.
Why the Cold Period Matters So Much
Cold triggers the chemical changes that stretch stems tall. Without enough chilling, stems stay short and flowers open low. Meanwhile, roots need cool soil rather than frozen ground initially. As a result, fall timing balances root growth against winter cold.
Gardeners in cold regions get this chilling free from winter. However, gardeners in mild regions must supply chilling artificially. Still, both groups share the same basic planting method. When you understand the cycle, every later step makes sense.
Choosing Healthy Tulip Bulbs First
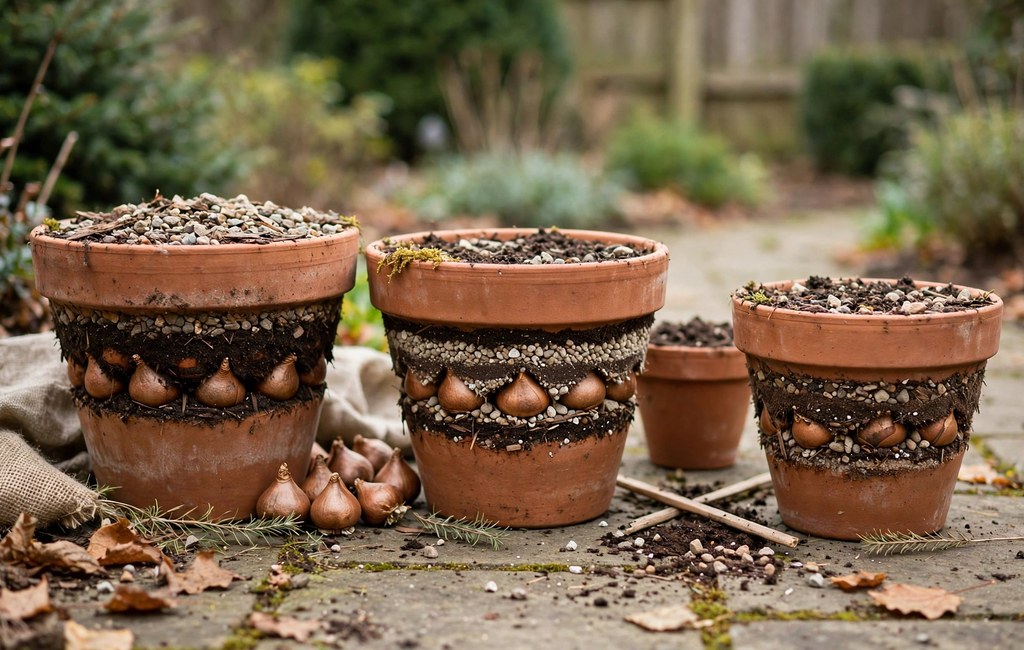
Your display begins at the shop, not at the spade. Firm, heavy bulbs carry the reserves that power spring growth. Still, weak or damaged bulbs rarely recover after planting. So inspect every bulb before it reaches the soil.
Signs of a Healthy Bulb
First, pick up each bulb and squeeze it gently. Healthy bulbs feel firm and heavy for their size. Meanwhile, soft or spongy bulbs often hide rot inside. Also, discard bulbs carrying mold, deep cuts, or sour smells. Gardeners plant tulip bulbs once nights cool down in fall.
Look for intact papery skin covering most of the surface. However, small skin tears alone rarely harm the bulb itself. By contrast, exposed flesh dries quickly and invites infection. Next, check the flat base for firmness and early roots.
- Firm flesh: Press gently and reject any bulb that collapses under pressure.
- Clean base plate: Choose bulbs whose flat base feels solid and intact.
- Dry outer skin: Keep bulbs whose papery covering looks dry and unbroken.
- No mold patches: Discard bulbs showing fuzzy growth or dark spreading spots.
Why Bulb Size Matters
Larger bulbs store more food for roots, stems, and flowers. As a result, they usually produce stronger stems and bigger blooms. In practice, the largest grade suits prominent beds and containers. Still, smaller bulbs can perform well in natural drifts.
Species tulips naturally produce smaller bulbs than hybrid types. Yet their modest size never signals poor bulb quality. When you compare bulbs, compare within the same variety group. Otherwise, size differences between varieties can mislead your judgment.
Storing Bulbs Before Planting Day
Sometimes weather delays planting after your bulbs arrive home. Store waiting bulbs somewhere cool, dry, dark, and airy. Also, keep them in mesh bags or open trays. In fact, sealed plastic traps moisture and encourages mold growth.
Check stored bulbs weekly and remove any that soften. Then plant as soon as soil conditions allow you. Meanwhile, never store bulbs near ripening fruit at home. Over time, even short warm storage weakens stored flower buds.
Picking the Right Site to Plant Tulip Bulbs
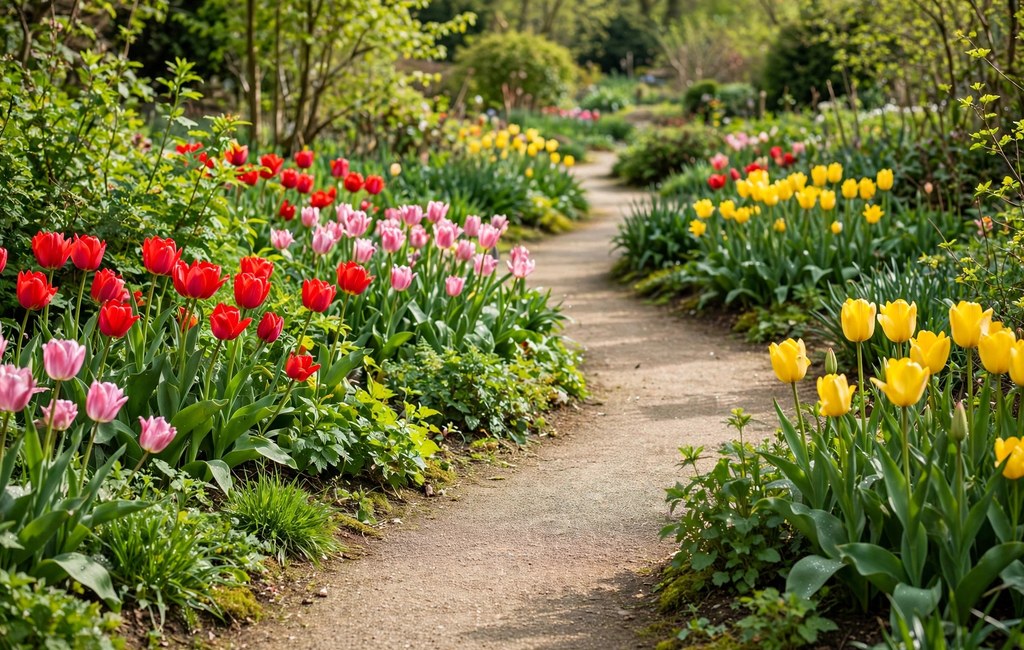
Tulips perform best where spring sunshine reaches them freely. Full sun supports sturdy stems and rich flower color. Also, open sites dry quickly after heavy spring rain. Still, light afternoon shade can extend blooms during warm spells.
Sunlight and Shelter
First, watch candidate beds across one full sunny day. Note where buildings, fences, and trees cast lasting shadows. Then remember that leafless spring trees admit more light. In fact, many beds under deciduous trees suit tulips well.
Shelter from strong wind protects tall stems from snapping. However, solid fences can trap cold, damp air nearby. By contrast, open planting with low neighboring plants works well. So balance wind protection against good air movement overall. Homeowners plant tulip bulbs across beds and borders each fall.
Drainage and Bed Position
Bulbs sit underground through months of wet winter weather. As a result, standing water threatens them more than cold. Choose beds where water never pools after heavy storms. Meanwhile, gentle slopes and raised beds shed excess water naturally.
Before planting, dig a test hole and fill it with water. Then watch how quickly the water level falls afterward. If drainage stays slow, improve the bed before planting bulbs. Alternatively, move the planting to a naturally drier garden position.
Think also about where you will view the flowers. Beds near paths and windows reward you every single day. In practice, visible plantings also get better ongoing care. Finally, avoid spots where winter road salt washes in.
Preparing Soil Before You Plant Tulip Bulbs
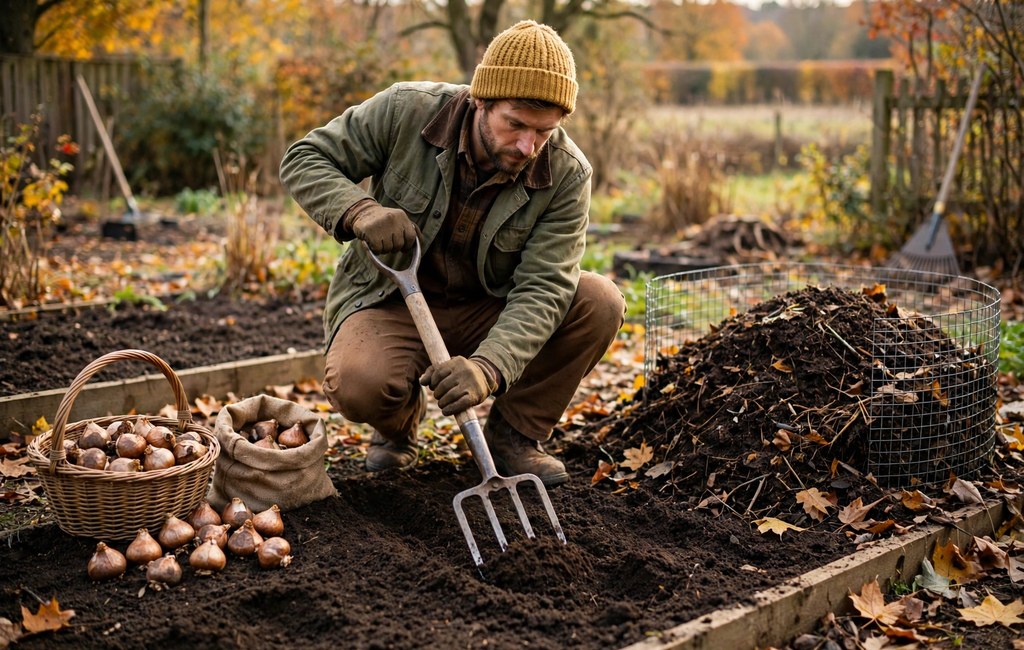
Tulip roots need loose soil that holds moisture without staying soggy. Gardeners often ask about a reliable soil mix recipe for good reason. In practice, drainage matters more than richness for bulbs. Still, modest fertility supports steady root and leaf growth.
Loosening and Improving the Bed
First, clear weeds, stones, and old roots from the bed. Next, loosen the soil well below the intended planting depth. Then mix finished compost through the loosened planting layer. As a result, roots spread easily and find even moisture.
Heavy clay holds water tightly around resting bulbs. However, coarse grit worked through clay opens drainage channels. Also, compost improves clay structure gradually across several seasons. By contrast, fine sand alone can make clay beds denser.
- Finished compost: Work compost into the bed to improve structure and moisture balance.
- Coarse grit: Add grit to heavy soil where water drains very slowly.
- Leaf mold: Use leaf mold to lighten soil and feed soil life gently.
- Fresh manure: Avoid fresh manure because it can damage roots and encourage rot.
Getting Soil Acidity and Feeding Right
Tulips prefer soil that sits close to neutral acidity. If you suspect strongly acidic soil, test before amending anything. Then add lime only when test results recommend it. In fact, blind amending can create new nutrient problems quickly.
The bulb itself carries food for its first flower. Meanwhile, a modest balanced fertilizer can support early root growth. Mix fertilizer into soil below where bulbs will sit. Otherwise, concentrated fertilizer touching bulbs may scorch young roots. You can also plant tulip bulbs in raised beds and large pots.
Setting Depth and Spacing for Tulip Bulbs
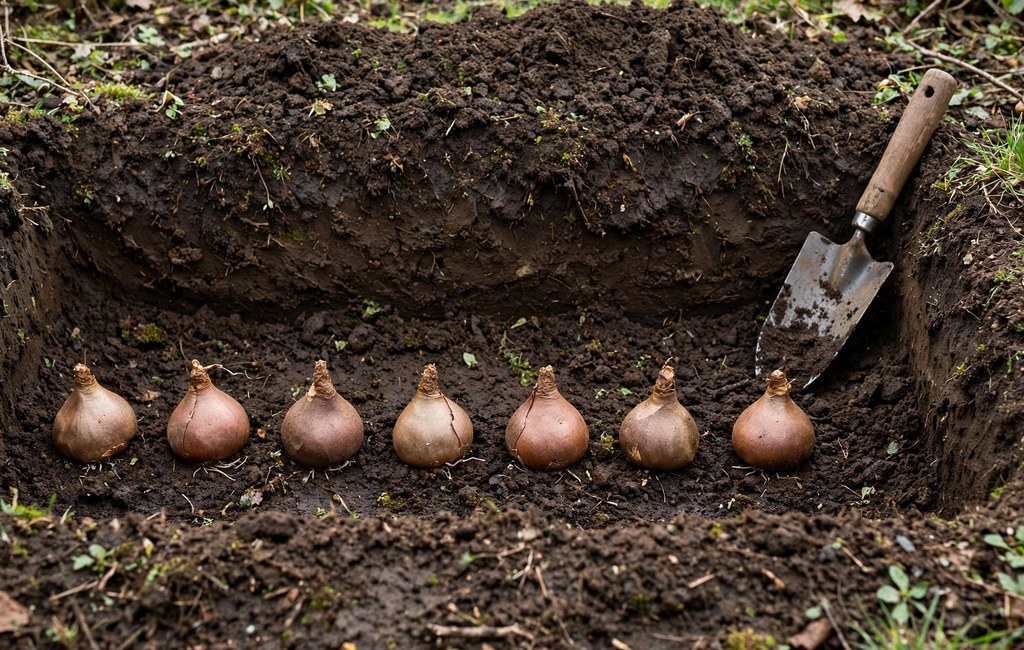
Many failures begin with guessing how deep to dig each hole at planting time. Depth controls stem strength, bulb survival, and repeat flowering. In practice, one simple measuring habit prevents most depth errors. So measure from the base of each bulb upward.
The Three-Times Rule in Practice
Plant each bulb about three times its own height deep. Measure that depth from the bulb base, not its tip. Then check your trowel against the first few holes dug. As a result, later holes stay consistent across the bed.
Deeper planting anchors tall varieties against spring wind gusts. Also, deeper bulbs stay cooler during early warm spells. By contrast, shallow bulbs often produce short, weak stems. Yet excessively deep bulbs may emerge late and unevenly.
Spacing Bulbs for Air and Impact
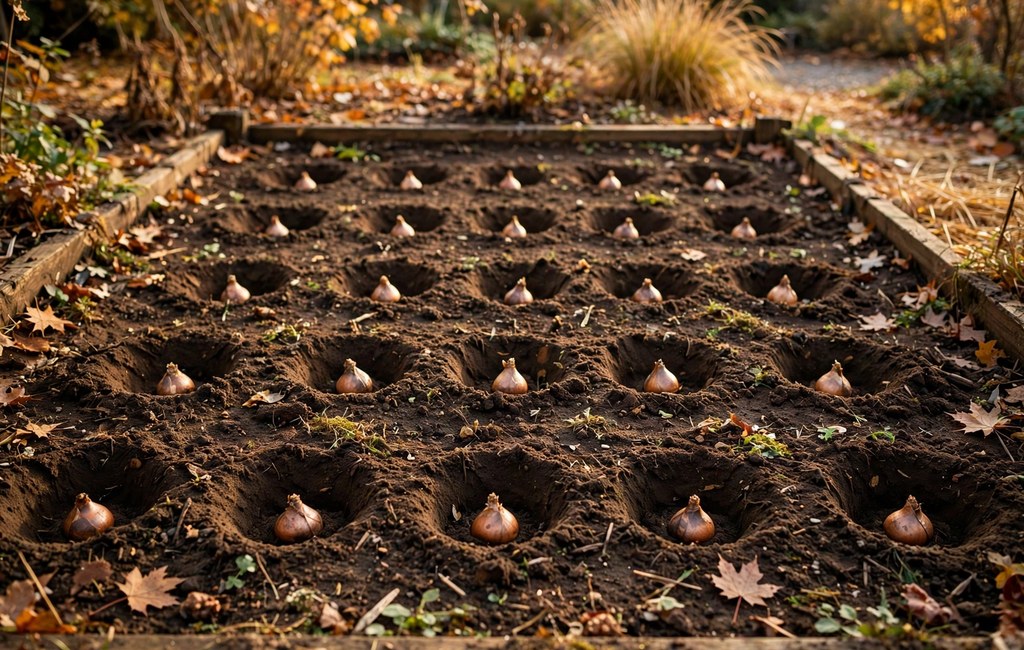
Space standard bulbs four to six inches apart in beds. Closer spacing creates dense, dramatic sweeps of spring color. However, bulbs still need soil contact on every side. So never let neighboring bulbs touch inside the hole.
Plant in groups of one variety rather than single rows. Odd-numbered groups usually look natural in informal garden beds. Meanwhile, formal beds suit even grids and straight lines. Finally, leave room between groups for labels and access.
Planning Tulip Bulb Drifts, Rows, and Color Groups

Design decisions in fall shape how spring actually feels. Loose drifts look relaxed, while straight rows look formal. First, match the planting pattern to your garden’s overall style. Then commit fully instead of mixing patterns within one bed.
Scatter bulbs gently by hand for natural-looking informal drifts. Plant each bulb exactly where it happens to land. As a result, group edges soften and spacing varies naturally. By contrast, measured grids suit parterres and formal borders.
Working With Color Deliberately
Single-color blocks read clearly from across the garden. Mixed colors sparkle up close but can look scattered far away. In practice, most gardens benefit from both approaches somewhere. So place bold blocks near viewing points and mixes beyond. Most gardeners plant tulip bulbs deeper where sandy soil drains fast.
Repeat one color through several beds for visual unity. Also, pair tulips with daffodils for a longer combined display. Meanwhile, dark flowers gain impact against pale neighboring blooms. Finally, note favorite combinations in a garden notebook.
Layering Bulbs for a Longer Display
Layering stacks bulbs at different depths within one area. Smaller bulbs sit shallower, above the larger tulip bulbs below. Then each layer flowers in its own natural sequence. In fact, layered plantings suit small gardens especially well.
Choose companions whose foliage matures without smothering the tulips. However, avoid dense groundcovers directly above newly planted bulbs. Still, a light mulch layer finishes layered beds neatly. Over time, you will learn which combinations suit your soil.
Gathering Tools to Plant Tulip Bulbs
Good preparation turns planting day into steady, pleasant work. First, gather every tool before you carry bulbs outside. Then sort bulbs by variety and label each group. As a result, planting flows without muddled colors or varieties.
- Sturdy trowel or bulb planter: Use a tool marked with depth measurements for consistency.
- Garden fork: Loosen compacted soil with a fork before digging holes.
- Watering can or hose: Keep water ready for the deep watering after planting.
- Plant labels: Write variety names immediately while positions stay fresh in mind.
- Kneeling pad: Protect your knees during long sessions of close work.
A bucket carries bulbs, labels, and small tools together. Meanwhile, a wheelbarrow helps with compost and mulch deliveries. Also, gloves protect hands from rough soil and grit. Finally, check the weather forecast before committing your afternoon.
Planting Tulip Bulbs, Step by Step
Once soil, site, and layout feel settled, planting moves quickly. Work on a dry day when soil crumbles easily. Also, keep bulbs shaded while you prepare their holes. Then plant promptly rather than leaving bulbs exposed outdoors.
Digging Holes and Trenches
First, mark each group position with a label or stick. Next, dig individual holes for small groups of bulbs. Alternatively, open a wide trench for large group plantings. In practice, trenches speed planting and improve spacing control.
Loosen the soil at the bottom of each hole. Then level that base so bulbs sit upright securely. If soil feels heavy, add a thin grit layer below. As a result, water moves away from the bulb base. Gardeners plant tulip bulbs before the ground freezes hard.
Setting Each Bulb in Place
Set each bulb with its pointed tip facing upward. The flat basal plate belongs down against the soil. However, a sideways bulb usually corrects its own growth direction. Still, upright placement gives the straightest, most even stems.
- Position the bulb: Set the bulb upright and steady it with one hand.
- Backfill gently: Push loosened soil around the bulb without shifting its position.
- Firm the surface: Press soil lightly to remove large air pockets below.
- Label the group: Mark variety and color before you move along the bed.
After backfilling, check that no bulb tips remain exposed. Then rake the surface level across the whole bed area. Finally, stand back and compare group positions before watering.
Watering and Mulching Newly Planted Tulip Bulbs
Water the bed thoroughly once planting is complete. This first watering settles soil firmly around each bulb. As a result, roots make contact and begin growing sooner. Then let autumn rainfall handle most later watering needs.
When Bulbs Need More Water
If autumn stays dry for weeks, water deeply occasionally. Check moisture below the surface before reaching for the hose. Meanwhile, dormant bulbs in wet soil need no extra water. By contrast, container bulbs dry faster and need closer watching.
Stop supplemental watering once regular winter rain arrives. Still, never let newly planted bulbs sit bone dry. In fact, roots grow actively long before shoots appear. So early moisture matters more than many gardeners expect.
Mulching the Planted Bed
Apply mulch after the soil surface turns properly cold. Mulch steadies soil temperature through freeze and thaw cycles. Also, a mulch layer suppresses early weeds around emerging shoots. Yet mulch applied too early can shelter rodents near bulbs.
Shredded bark, straw, and chopped leaves all work well. Keep mulch loose rather than packed tightly over the bed. Then pull mulch back slightly as shoots emerge in spring. Finally, top up thin patches after hard weather passes.
Caring for Tulip Bulbs as Shoots Emerge
Spring care begins the moment green tips break the surface. First, clear away winter debris without damaging young shoots. Then inspect each group and note any missing patches. In practice, early attention catches problems while fixes remain easy. You should plant tulip bulbs soon after buying them in fall.
Feeding and Watering Growing Plants
Feed emerging plants lightly when leaves reach several inches tall. Use a balanced fertilizer and follow its label directions carefully. Also, water during long dry spells while buds develop. As a result, stems grow taller and flowers last longer.
Avoid overhead watering once flowers open in the bed. Wet petals spot easily and invite fungal problems quickly. Meanwhile, morning watering lets foliage dry before evening arrives. By contrast, soggy spring soil still harms actively growing bulbs.
Protecting Shoots From Late Frost and Wind
Hard late frosts can damage tender emerging tulip foliage. However, established tulips tolerate brief cold snaps remarkably well. Cover prized plantings with fleece during unusually severe nights. Then remove covers promptly once morning temperatures climb again.
Tall varieties may lean after storms in exposed beds. Stake leaning stems loosely rather than tying them tightly. Still, most stems straighten themselves after calm weather returns. Finally, keep slugs away from damaged, soft spring growth.
Plant Tulip Bulbs in Containers for Patios
Containers bring tulips close to doors, paths, and windows. Many apartment gardeners start by growing in pots on sunny balconies. Pots also suit gardens where soil drainage stays poor. Still, containers demand closer attention than open beds.
Choosing and Filling the Pot
First, choose a pot with generous drainage holes underneath. Depth matters because bulbs still need proper planting depth. Then fill with a free-draining, soil-based potting mix. Also, raise pots on small feet to improve drainage.
Space container bulbs closer than bulbs in open ground. However, leave a small gap between every neighboring bulb. In practice, tight groups create the fullest container displays. Next, water the filled pot until moisture drains freely.
Protecting Pots Through Winter
Container soil freezes harder than soil in open ground. As a result, pots need shelter in very cold spells. Move pots against a protected wall during severe weather. Alternatively, wrap pots with insulating material through cold snaps. Beginners often plant tulip bulbs in groups rather than single rows.
Check container moisture monthly during dry winter periods. Water lightly only when the mix feels dry below. Meanwhile, keep pots away from warm indoor rooms entirely. Finally, move containers into full light as shoots emerge.
Why Gardeners Plant Tulip Bulbs Over Seeds
New growers sometimes debate starting from seed instead before their first planting. Bulbs offer a stored flower and a predictable timetable. By contrast, seed-grown tulips take years to reach flowering size. So beginners almost always achieve better results from bulbs.
What Seed Growing Really Involves
Seed suits patient gardeners interested in breeding new varieties. First, seed needs its own cold period before germination. Then seedlings need several seasons of careful, undisturbed growth. In fact, most seedlings never match their parent flowers.
Bulbs, meanwhile, clone the named variety you selected. Also, bulbs let you plan exact colors and heights. Yet seed growing rewards curiosity and long-term experimentation. Overall, treat seed as a project, not a shortcut.
Hybrid seed also produces unpredictable flower colors and forms. Still, dedicated breeders accept those odds for novelty alone. When garden space feels limited, bulbs use it better. As a result, seed trays belong in a separate corner.
Plant Tulip Bulbs Where Winters Stay Mild
Tulips evolved with cold winters and expect real chilling. Fortunately, gardening where winters stay mild still works with preparation. Gardeners there supply the cold that winter withholds. Then they time planting for the coolest available weeks.
Prechilling Bulbs in the Refrigerator
Chill bulbs in the refrigerator for weeks before planting. Store them inside a paper bag or mesh bag. Meanwhile, keep bulbs away from ripening fruit during chilling. Ripening fruit releases gas that can damage flower buds.
Plant chilled bulbs promptly once your planting window opens. Also, choose the coolest, brightest bed available for them. Then mulch generously to keep soil temperatures steadier there. As a result, stems stretch better before warm weather arrives. Gardeners plant tulip bulbs where early spring sun reaches.
Treating Tulips as Annuals in Hot Regions
In the warmest areas, many gardeners replant fresh bulbs yearly. However, that approach guarantees strong flowers every single spring. By contrast, leftover bulbs often return small or blind. So plan on replacement bulbs as a yearly routine.
Early-flowering varieties suit short, mild winters especially well. Still, afternoon shade helps flowers last in warm springs. In practice, morning sun with afternoon shade works best there. Finally, remove spent bulbs once their foliage yellows completely.
Common Mistakes When You Plant Tulip Bulbs
Most tulip failures trace back to planting day itself. First, gardeners often rush before the soil cools properly. Warm soil invites fungal disease and weak early growth. As a result, patience in fall beats speed every time.
- Planting upside down: Check each bulb twice because inverted bulbs waste energy correcting themselves.
- Skipping the first watering: Water after planting because dry pockets delay root growth significantly.
- Planting in soggy soil: Move or improve wet beds because resting bulbs rot underground.
- Forgetting labels: Label every group because spring colors never match fall memories.
Another common error involves planting single bulbs in isolation. Single tulips look lost and read as accidental plantings. Meanwhile, groups of seven or more create real presence. So always plant tulips in deliberate, generous groups.
Crowding bulbs tightly also causes disappointing spring results. However, sparse planting wastes bed space and visual impact. In practice, the spacing guidance above balances both risks. Finally, record mistakes honestly and adjust next fall.
Keeping Squirrels Away From Tulip Bulbs
Freshly planted bulbs attract hungry squirrels within days. So start keeping squirrels away from new beds on planting day itself. Squirrels notice disturbed soil and investigate it very quickly. Also, loose papery husks nearby advertise your recent planting.
Barriers That Actually Block Digging
- Wire mesh cover: Lay mesh over the bed and pin its edges firmly down.
- Bulb cages: Plant bulbs inside wire cages in heavily raided garden beds.
- Gravel topping: Spread coarse gravel where squirrels dig most often each fall.
- Thorough cleanup: Remove every husk and bulb scrap from the soil surface.
First, lay wire mesh flat across newly planted beds. Then secure the edges so animals cannot lift them. Remove mesh promptly when spring shoots begin pushing upward. In practice, this simple barrier defeats most casual digging.
Deterrents and Companion Plantings
Some gardeners plant daffodils among tulips as companions. Animals dislike daffodils and often leave nearby plantings alone. Yet no companion planting guarantees complete protection by itself. So combine companions with physical barriers for best results. You can plant tulip bulbs beside daffodils for layered color.
Commercial repellents help some gardeners and disappoint others. In fact, evidence for most repellent products remains mixed. If you try one, reapply it after heavy rain. Meanwhile, never rely on repellents where digging pressure stays high.
Deer present a different problem above ground in spring. They clip buds and flowers cleanly overnight without warning. However, fencing protects prized beds more reliably than sprays. Still, neighborhood cats sometimes patrol bulb beds quite effectively.
When Tulip Bulbs Leaf Out Without Flowering
Few spring sights disappoint more than healthy leaves alone. Understanding why flowers fail to appear starts with honest diagnosis. Most blind bulbs suffered one fixable problem underground earlier. Also, the same bulb may recover after better treatment.
The Most Common Causes
- Insufficient depth: Bulbs planted too shallowly often lack the strength for flowers.
- Missing chill: Bulbs without enough cold produce leaves but no flower buds.
- Early foliage loss: Leaves removed too soon starve the following year’s flower completely.
- Crowded old clumps: Aging bulbs compete underground and gradually lose flowering strength.
- Deep shade: Bulbs in heavy shade cannot rebuild their food stores properly.
First, recall how deeply you planted the failing bulbs. Next, consider whether winter delivered enough sustained cold weather. Then honestly review when last year’s foliage disappeared completely. As a result, one likely cause usually stands out.
Fixing the Problem Next Season
Correct the clearest cause before changing everything at once. For example, replant sound bulbs deeper in a sunnier bed. Also, feed actively growing foliage during the spring season. Still, discard soft or rotting bulbs without any hesitation.
Mark disappointing clumps while their leaves remain visible. Then lift and inspect them after foliage yellows fully. By contrast, healthy firm bulbs deserve one more chance. Finally, replace exhausted bulbs that fail twice running.
Caring for Tulip Bulbs After Flowers Fade
The weeks after flowering decide next spring’s display. Good care during the fading weeks rebuilds each bulb underground. Flowers fade quickly, yet the plant keeps working hard. So resist tidying the bed too early this season.
Deadheading and Feeding After Bloom
First, snap or cut off each spent flower head. This simple step stops the plant forming seed pods. As a result, energy returns to the bulb instead. Then feed the bed while leaves stay green. Gardeners plant tulip bulbs in odd-numbered clusters for natural drifts.
Water during dry spells while foliage remains active. However, stop feeding once leaves begin yellowing naturally. In practice, green leaves signal ongoing food production underground. Meanwhile, yellowing leaves signal the bulb finishing its work.
Letting Foliage Die Back Naturally
Leave foliage standing about six weeks after flowering ends. Leaves manufacture the food that powers next year’s flower. Yet gardeners often cut them early for neatness alone. So hide fading leaves behind later emerging perennial plants.
Once foliage yellows and loosens easily, remove it cleanly. Then decide whether bulbs stay or need lifting instead. In suitable soil, many bulbs remain happily in place. Finally, lift bulbs where wet summer soil threatens rot.
Planning Tulip Bulb Varieties for a Longer Season
Tulip season stretches when you combine different flowering times. Early, midseason, and late varieties bloom in natural succession. As a result, one bed can flower for many weeks. So plan groups by bloom time before ordering bulbs.
Reliable Groups Worth Knowing
- Darwin hybrids: Choose these tall types for strong stems and dependable returns.
- Species tulips: Plant these smaller types where naturalizing matters most to you.
- Triumph tulips: Use these midseason types for classic shape and varied colors.
- Double tulips: Pick these lush types for full, peony-like spring flowers.
Fringed and parrot tulips add texture late in the season. However, exotic forms often return less reliably than simpler types. In fact, many showy hybrids behave like short-lived perennials. By contrast, species and Darwin types return most consistently.
Building a Succession Planting Plan
First, assign each bed corner an early, middle, or late role. Next, repeat colors across groups to unify the display. Then record variety names before their packaging disappears forever. Also, photograph beds in bloom for next fall’s planning.
Note gaps and overcrowding while flowers still show them. Meanwhile, mark varieties that performed weakly in your soil. Over time, your records turn guesswork into reliable planning. Finally, order replacement bulbs while spring lessons stay fresh.
Frequently Asked Questions About Planting Tulips
Can you plant tulip bulbs in spring instead of fall?
In practice, spring-planted bulbs rarely bloom because they miss needed winter chilling.
Do tulip bulbs multiply underground over the years?
Over time, healthy bulbs produce small offsets that eventually reach flowering size themselves.
When should you lift and store tulip bulbs?
Lift bulbs after foliage yellows, then store them dry, cool, and well ventilated.
Can you plant tulips alongside other spring bulbs?
Tulips pair well with daffodils and grape hyacinths in shared beds and layered plantings.
How long do tulip flowers last once they open?
In cool weather, individual flowers often last a week or more before fading.
Conclusion
Planting tulips well comes down to timing, depth, and drainage. First, choose firm bulbs and a sunny, free-draining site. Then plant carefully, water once, and protect the bed. As a result, spring rewards a few hours of autumn work.
Start this fall with one well-planned bed or container. Choose varieties across the season for the longest display. Finally, explore the longest lasting varieties and order your favorites today.