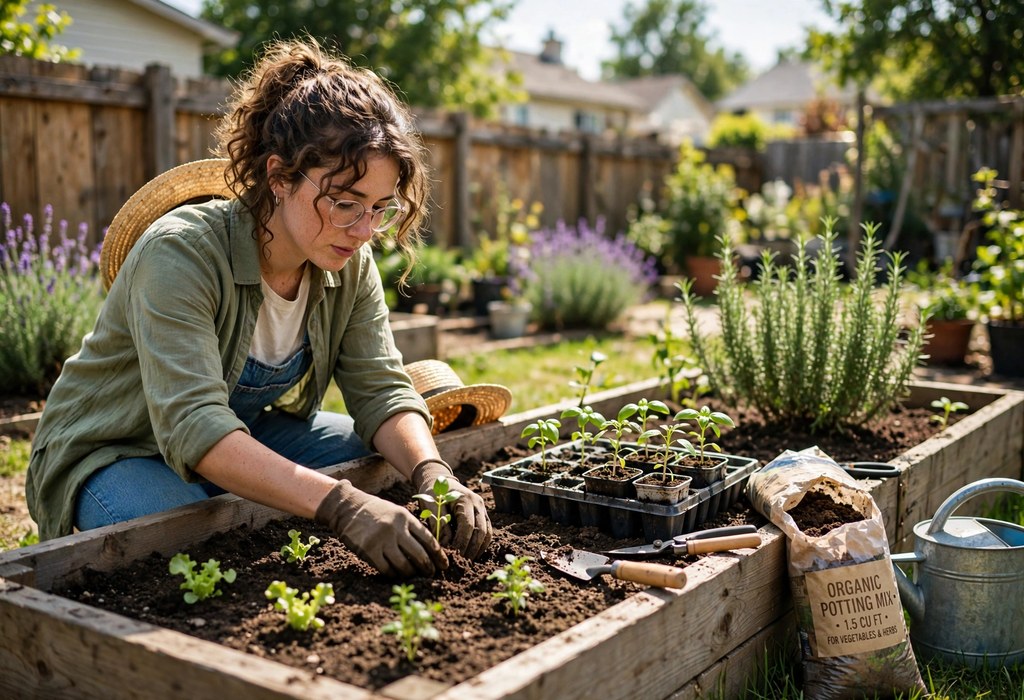
You can start a garden bed with a sunny spot, loose soil, and suitable plants. First, plan the size, shape, and location before you dig or build anything. Then, clear the ground, feed the soil, and plant at the right time.
A small bed keeps early work manageable and helps you learn quickly. Additionally, one well cared bed often produces more food than several neglected beds. This guide walks through planning, preparing, and planting in simple steps.
You do not need perfect soil, costly tools, or prior growing experience. Instead, you need patience, steady watering, and regular observation. Finally, each small success builds confidence for a larger bed next season.
Plan Your Garden Bed Before You Dig
Set Clear Goals for Your First Garden Bed
Begin by deciding what you want from your first garden bed. Some gardeners grow salads, herbs, and simple vegetables for daily meals. Others prefer flowers, pollinator plants, and cheerful color through summer. This guide explains how to start a garden bed from planning to planting.
Next, list only a few crops that your household will actually eat or enjoy. A short list prevents waste, reduces work, and keeps harvesting joyful. Additionally, a focused bed teaches you each plant more deeply.
Then, think honestly about the time you can give each week. A bed needs watering, weeding, and harvesting, even in busy weeks. Therefore, start with a size that fits your routine, not your ambition.
Sketch a Simple Garden Bed Layout on Paper
Draw your yard shape on paper and mark fences, trees, and paths. Add the bed shape, walking space, and a nearby water source. This simple sketch reveals problems before you move any soil.
Meanwhile, note where shade falls in the morning and afternoon. Shade patterns change with seasons, trees, and nearby buildings. A sketch helps you compare sunny areas across the day.
Finally, keep paths wide enough for a wheelbarrow and comfortable kneeling. Wide paths protect soil structure because you never step inside beds. Similarly, clear edges make mowing and weeding much easier.
Choose a Sunny and Reachable Location
Watch Sunlight on Your Garden Bed Across the Day
Most vegetables and many flowers need six to eight hours of direct sun. Watch your yard at morning, midday, and late afternoon for shadows. Then, pick the brightest area that stays sunny through the day. Anyone can learn how to start a garden bed with basic tools and patience.
Morning sun dries leaves quickly and often reduces disease problems. Afternoon sun feels stronger, so tender plants may need some shelter. However, most food crops still prefer the sunniest spot available.
First, learn about choosing a garden bed location before you mark any edges. A careful location choice saves years of weak growth and frustration. Additionally, a good spot makes watering, weeding, and harvesting easier.
Keep Water and Paths Close to Your Garden Bed
Place your bed near a tap, hose, or rain barrel for easy watering. Short watering trips encourage steady care during hot, dry spells. Similarly, nearby storage keeps tools handy and work sessions shorter.
Avoid low spots where water pools after heavy rain. Standing water suffocates roots and invites slugs and disease. Therefore, choose ground that drains steadily but still holds moisture.
Also, keep the bed close enough to visit daily without effort. Frequent visits help you spot pests, dry soil, and ripe crops early. Finally, a visible bed often receives better care than a distant one.
Decide Between Raised and In-Ground Beds
Understand the Main Garden Bed Differences
In-ground beds use existing soil and usually cost less to start. Raised beds use frames and imported soil for better control. Each style suits different yards, budgets, and physical needs. A clear plan makes learning how to start a garden bed simple and rewarding.
Raised beds warm earlier in spring and drain more freely. In-ground beds hold moisture longer and need less frequent watering. However, both styles can grow healthy plants with good preparation.
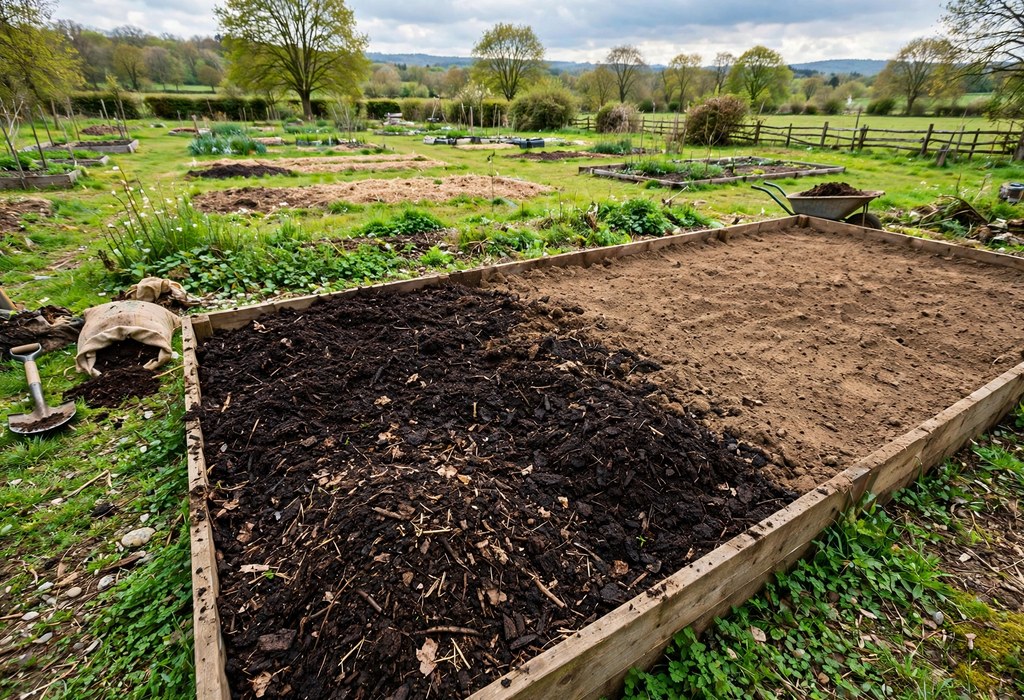
Next, compare raised vs. in-ground garden beds for your soil and space. Poor native soil often favors a raised bed with fresh growing mix. Additionally, good native soil makes an in-ground bed very attractive.
Match the Garden Bed Style to Your Yard
Choose raised beds for compacted soil, tree roots, or poor drainage. Frames also help gardeners who prefer less bending and kneeling. Meanwhile, in-ground beds suit large areas and lower budgets.
Consider slope, rocks, and nearby trees before you commit. Tree roots compete for water and nutrients in nearby beds. Therefore, leave generous distance between trees and new beds.
Finally, think about future expansion and permanent paths. A clear plan prevents awkward shapes and wasted space later. Similarly, permanent paths keep soil loose and roots undisturbed.
Plan Size, Shape, and Spacing
Start With a Reachable Garden Bed Width
Keep beds narrow enough to reach the center from either side. A width near four feet works well for most adult gardeners. Wider beds tempt you to step inside and compact the soil. Beginners find how to start a garden bed easier with step by step guidance.
Length matters less, so extend beds along sunny, level ground. Shorter beds suit small yards and help you manage work in stages. Additionally, shorter beds make crop rotation simpler each season.
First, study garden bed size and spacing before you build or mark rows. Correct spacing improves airflow, light, and access for harvesting. Meanwhile, crowded plants compete for water and invite disease.
Leave Room for Paths and Garden Bed Growth
Leave paths about two feet wide between beds for comfortable movement. Wider paths help wheelbarrows, kneeling pads, and harvest baskets. Similarly, clear paths reduce damage to stems and leaves.
Plan spacing from each plant mature size, not its seedling size. Seedlings look tiny, yet many crops spread widely within weeks. Therefore, read seed packets and plant tags before you sow.
Finally, leave extra room for tall crops, trellises, and sprawling vines. Tall plants can shade shorter neighbors if placed carelessly. Place tall crops on the northern side whenever possible.
Clear the Ground Carefully
Remove Grass, Weeds, and Debris From Your Garden Bed
Clear rocks, sticks, and rubbish from the chosen bed area first. Then, cut grass and weeds close to the ground with shears. Short growth makes removal, smothering, and digging much easier. Good soil preparation is central to how to start a garden bed successfully.
Pull weeds with roots intact, especially perennial weeds with deep roots. Broken roots often regrow quickly and compete with new plants. Additionally, remove seed heads before they scatter across the bed.
Next, learn about removing grass and weeds before planting for lasting results. Clean ground gives seeds and transplants a stronger start. Meanwhile, fewer weeds mean less competition for light and water.
Protect Garden Bed Soil Life While You Clear
Avoid deep digging on wet soil because wet soil compacts easily. Work soil only when it crumbles softly in your hand. Similarly, avoid turning soil repeatedly without a clear reason.
Earthworms, fungi, and microbes build healthy soil structure naturally. Gentle handling protects their tunnels, networks, and food sources. Therefore, disturb soil as little as your chosen method allows.
Finally, save healthy topsoil and compostable plant material separately. You can reuse clean material as mulch or compost feedstock. However, discard diseased plants and invasive weeds with household waste.
Try a No-Dig Start
How Layering Builds a Garden Bed
No-dig beds build soil upward with layers of organic matter. Cardboard smothers grass, compost feeds plants, and mulch protects moisture. This method avoids heavy digging and preserves soil structure.
First, mow grass short and lay overlapping plain cardboard over the area. Remove tape and staples, then soak the cardboard thoroughly with water. Next, add several inches of mature compost over the cardboard layer.
Then, consider starting a no-dig garden bed if digging feels difficult. Layered beds suit lawns, weedy ground, and gardeners seeking gentler work. Additionally, worms gradually mix organic matter into soil below.
Plant Into Garden Bed Layers With Confidence
Plant transplants directly into the compost layer after watering well. Make a small hole, settle roots gently, and firm compost around them. Seeds also grow well in fine, moist compost near the surface.
Deep-rooted crops may grow slowly until lower soil softens further. Meanwhile, shallow-rooted salads, herbs, and leafy crops thrive quickly. Choose suitable crops for the first season in a new layered bed.
Finally, top up compost each season as layers settle and decompose. Regular feeding maintains depth, fertility, and moisture retention. Similarly, mulch renewal keeps weeds down and soil life active.
Prepare Soil for Strong Roots
Test Garden Bed Texture, Drainage, and Fertility
Good soil feels crumbly, holds moisture, and drains without pooling. Squeeze moist soil gently, then watch whether it holds shape. Sandy soil falls apart, while clay soil forms a sticky ball. This method shows how to start a garden bed without costly mistakes.
Dig a small hole, fill it with water, and watch drainage speed. Slow drainage signals compaction, clay, or a low lying spot. Additionally, a soil test reveals acidity and nutrient levels clearly.
First, focus on preparing soil for a garden bed before buying plants. Preparation matters more than fancy tools or rare varieties. Meanwhile, healthy soil supports roots through heat and drought.
Loosen Soil Without Destroying Structure
Loosen compacted soil with a garden fork, not repeated deep tilling. Push the fork in, rock gently, and lift without flipping soil layers. This approach opens air channels while protecting soil life.
Work in compost as you loosen, especially in clay or sandy soil. Compost improves drainage in clay and moisture retention in sand. Therefore, mix compost evenly through the top several inches.
Finally, rake the surface level and remove remaining stones and roots. A level surface helps water spread evenly across the bed. Similarly, smooth soil makes sowing and transplanting much easier.
Choose a Balanced Soil Mix
Understand Common Mix Ingredients
Topsoil provides mineral bulk, structure, and a base for roots. Compost adds nutrients, microbes, and better moisture handling. Coarse materials improve drainage and keep soil from compacting. Follow this guide to master how to start a garden bed this season.
Avoid using only compost, since pure compost settles and shrinks. Similarly, avoid dense garden soil alone in raised frames. A balanced mix stays loose, fertile, and workable through seasons.
Next, compare the best soil mix for garden beds for your bed style. In-ground beds need compost added to existing soil. Raised beds need a fuller mix built from several ingredients.
Use Simple Ratios for Beginners
A simple raised bed mix uses about two parts topsoil to one part compost. Add coarse material only if drainage remains poor after mixing. Then, water the mix and top up areas that settle noticeably.
For in-ground beds, spread two to three inches of compost on top. Fork compost lightly into the top six to eight inches. Additionally, repeat compost additions each season for steady improvement.
Finally, let the filled bed settle for a few days before planting. Settling reveals low spots and helps moisture spread evenly. Meanwhile, check the level after rain and top up if needed.
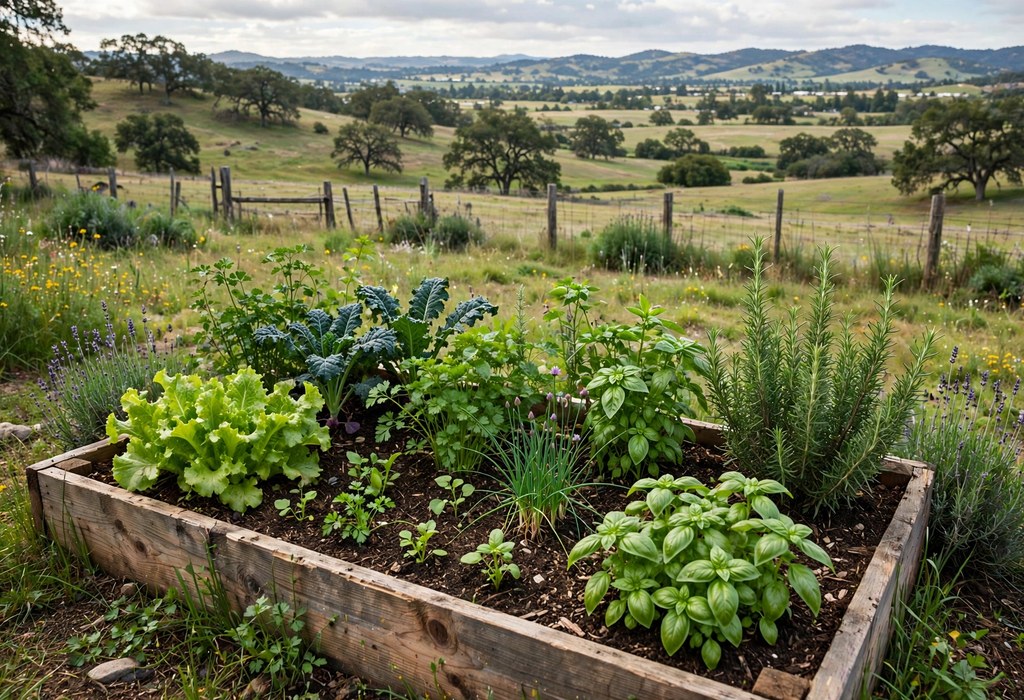
Pick the Best Time to Begin
Read Frost, Soil, and Weather Signals
Cool season crops tolerate light frost and cooler soil well. Warm season crops need warm soil and frost-free nights. Therefore, match planting dates to each crop, not the calendar alone. Steady care helps you master how to start a garden bed over time.
Soil should feel workable, not sticky, frozen, or waterlogged. Warm soil speeds germination and helps transplants establish quickly. Meanwhile, cold wet soil often causes seeds to rot.
First, check the best time to start a garden bed in your local area. Local frost dates, soil warmth, and rainfall shape good timing. Additionally, nearby gardeners often share useful seasonal experience.
Build Early and Plant in Stages
Build beds a few weeks before planting whenever possible. Early building lets soil settle, weeds emerge, and compost integrate. Then, you can remove early weeds before sowing or transplanting.
Stagger planting over several weeks for a longer harvest window. Small sowings prevent gluts and spread work more evenly. Similarly, succession planting replaces finished crops with fresh ones.
Finally, protect tender plants from late frost with covers or cloches. Covers trap warmth and shield leaves from cold wind. Remove covers during warm days to prevent overheating.
Choose Beginner Friendly Plants
Pick Crops That Forgive Mistakes
Lettuce, radishes, beans, and herbs grow quickly and tolerate learning curves. Cherry tomatoes, zucchini, and cucumbers reward steady basic care. Meanwhile, hardy herbs provide frequent harvests with little fuss.
Start with transplants for tomatoes, peppers, and other slow crops. Transplants skip fragile germination and shorten time to harvest. Additionally, nursery plants help beginners learn mature plant shapes.
Next, explore plants for a beginner’s garden bed suited to your sunlight. Match each crop to light, space, and water available. Similarly, group plants with similar needs together in beds.
Balance Food, Flowers, and Herbs
Mix vegetables with flowers to attract pollinators and beneficial insects. Marigolds, nasturtiums, and herbs add color and garden diversity. Meanwhile, diverse plantings often suffer fewer severe pest outbreaks.
Grow only a few varieties in your first season for easier learning. Repeated crops teach watering, spacing, and harvest timing quickly. Therefore, resist filling every inch with unfamiliar plants at once.
Finally, include at least one crop your household loves eating fresh. A favorite harvest motivates daily visits and careful observation. Similarly, fresh flavor makes early effort feel worthwhile.
Plant Seeds and Transplants Well
Sow Seeds at the Right Depth
Read seed packets carefully for depth, spacing, and germination time. A general rule plants seeds about twice as deep as their width. However, tiny seeds often need only a light soil covering.
Sow seeds in straight rows or clear patches for easy identification. Label each row immediately, since seedlings often look alike. Additionally, labels prevent accidental weeding of wanted plants.
Then, water gently after sowing so seeds stay in place. A fine spray settles soil around seeds without washing them away. Finally, keep the surface moist until seedlings emerge strongly.
Set Transplants at the Correct Level
Dig a hole slightly larger than each transplant root ball. Remove plants gently, loosen circling roots, and settle them upright. Plant at the same depth as their original container, usually.
Firm soil around roots, then water deeply to remove air pockets. Deep watering helps roots contact soil and begin growing outward. Meanwhile, avoid burying stems too deeply, except for tomatoes.
Harden off indoor seedlings gradually before moving them outside. Give them longer outdoor periods over seven to ten days. Additionally, shelter tender seedlings from strong wind and frost.
Water and Mulch New Beds
Water Deeply and Less Often
New beds need consistent moisture while roots establish and spread. Water deeply so moisture reaches roots, not just the surface. Shallow watering encourages weak roots near the surface.
Check soil moisture by pushing a finger two inches deep. Water when the top layer feels dry but lower soil remains cool. Additionally, water in the morning to reduce evaporation and disease.
First, learn about watering a newly planted garden bed before dry spells arrive. Steady watering prevents wilting, blossom problems, and poor establishment. Meanwhile, raised beds often dry faster than in-ground beds.
Mulch to Protect Soil and Roots
Mulch conserves moisture, suppresses weeds, and moderates soil temperature. Straw, shredded leaves, and wood chips all work well as mulch. Keep mulch a few inches away from plant stems.
Apply two to three inches after seedlings emerge or transplants settle. Thick mulch blocks light and slows many weed seeds. However, very thick mulch can also slow soil warming in spring.
Finally, replenish mulch as it thins, settles, or decomposes. Regular mulch care keeps beds tidy and soil life active. Similarly, mulch paths reduce mud and weed growth nearby.
Care for Your Bed Through the Season
Weed Little and Often
Weed briefly every few days rather than facing a large invasion. Small weeds pull easily and disturb neighboring roots less. Additionally, frequent weeding keeps beds neat and productive.
Learn seedling shapes so you never remove wanted crops accidentally. Take photos, use labels, and compare leaves before pulling plants. Meanwhile, weed after rain when soil releases roots more easily.
Finally, mulch bare gaps promptly after weeding to slow regrowth. Bare soil invites weed seeds, drying, and erosion. Similarly, dense planting shades soil and reduces weed pressure.
Feed, Support, and Watch Plants
Feed plants lightly with compost or balanced organic fertilizer as needed. Overfeeding pushes soft growth that pests and disease attack easily. Therefore, follow label rates and observe plant response first.
Support tall or sprawling crops with stakes, trellises, or cages. Early support prevents broken stems and keeps fruit cleaner. Additionally, vertical growth saves space in small beds.
Inspect leaves weekly, including undersides, for pests and disease. Early action often solves problems with hand removal or water sprays. Meanwhile, encourage beneficial insects with flowers and gentle care.
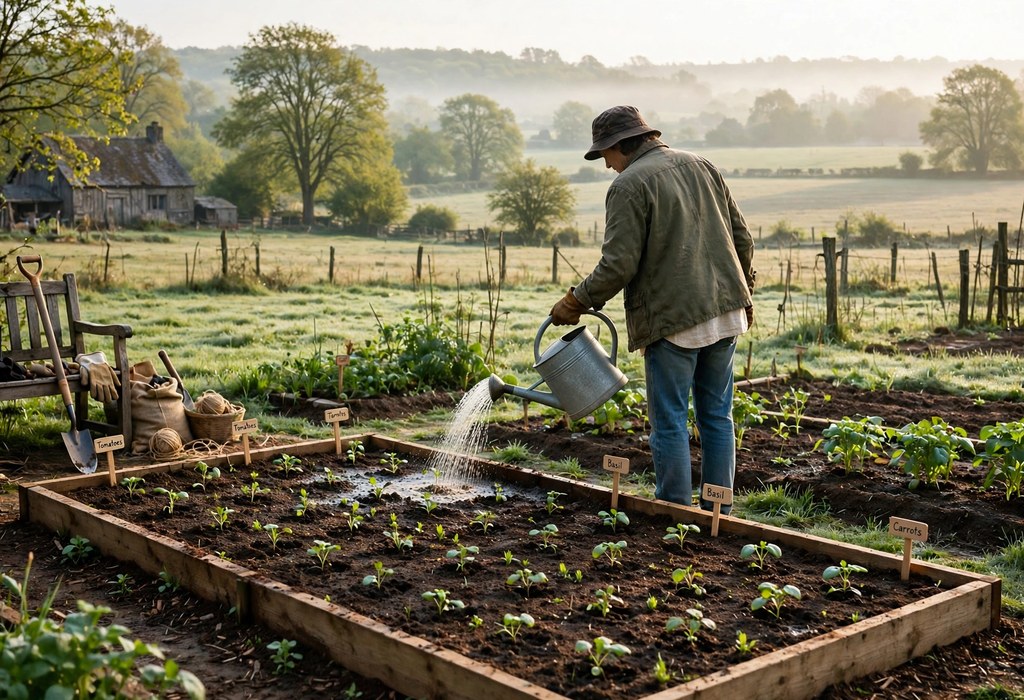
Welcome Pollinators and Wildlife
Add Flowers for Helpful Insects
Pollinators visit flowers for nectar and pollen throughout the growing season. Bees, butterflies, and hoverflies also support fruit and seed formation. Additionally, flowering herbs attract beneficial insects near vegetables.
Plant flowers in drifts near beds, not only in distant borders. Nearby flowers guide pollinators toward crops needing pollination. Meanwhile, diverse blooms extend visits across many weeks.
Choose open flowers that insects can reach easily for feeding. Single blooms often offer more nectar than complex double flowers. Finally, avoid spraying flowers during peak insect activity hours.
Create Simple Wildlife Friendly Habits
Leave a small water source nearby for birds and beneficial insects. Shallow dishes with stones prevent drowning and encourage visits. Additionally, fresh water attracts wildlife during hot dry spells.
Allow some herbs and flowers to bloom fully before cutting them. Blooming plants feed pollinators and add beauty to beds. Meanwhile, seed heads later feed birds and support next season.
Finally, keep a few undisturbed corners for shelter and nesting. Log piles, leaf litter, and dense shrubs offer safe hiding places. Wildlife friendly habits make gardens lively, balanced, and resilient.
Avoid Common Beginner Mistakes
Many beginners plant too much, too closely, and too early. Crowded beds compete for light, water, and nutrients constantly. Therefore, trust spacing guidance even when beds look empty initially.
Another common mistake involves watering lightly every single day. Frequent shallow watering creates weak roots and wasted water. Additionally, wet leaves at night invite fungal disease problems.
Finally, beginners often ignore soil preparation and expect instant success. Soil work feels slow, yet it shapes results for many seasons. Meanwhile, patient preparation rewards you with stronger plants.
- Start small: A single manageable bed teaches skills faster than several neglected beds.
- Follow spacing: Mature plant sizes matter more than tiny seedling sizes at planting time.
- Water deeply: Deep watering builds stronger roots and reduces daily watering chores.
- Observe daily: Short daily visits reveal pests, dry soil, and ripe crops much earlier.
- Keep records: Simple notes help you repeat successes and avoid past mistakes next season.
- Feed soil first: Healthy soil supports plants better than frequent fertilizer fixes alone.
Build a Simple First Season Plan
Break the season into planning, building, planting, and harvesting stages. Each stage needs different tools, materials, and time commitments. Additionally, a staged plan prevents overwhelming weekends and rushed decisions.
Gather tools early, including a fork, trowel, hose, and gloves. Add compost, mulch, labels, and supports before planting day. Meanwhile, prepare storage for harvests, seeds, and garden notes.
Finally, schedule regular short visits instead of rare long sessions. Short visits suit busy lives and keep small problems from growing. Similarly, routine care builds a satisfying habit over time.
- Week one: Choose a location, sketch the layout, and gather basic tools and materials.
- Week two: Clear the ground, build or mark the bed, and prepare the soil.
- Week three: Sow seeds, set transplants, water deeply, and apply mulch carefully.
- Week four: Weed lightly, check moisture daily, and watch for pests and growth.
Gather Simple Tools and Materials
Start With a Small Tool Kit
A garden fork, hand trowel, and watering can cover most beginner tasks. Add gloves, a bucket, and plant labels for comfort and organization. Additionally, a sturdy kneeling pad protects knees during planting work.
Choose tools that feel balanced and comfortable in your hands. Heavy tools tire beginners quickly and reduce enjoyment. Therefore, test handles and grips before buying anything new.
Clean tools after use and store them in a dry place. Sharp, clean blades last longer and spread less disease between plants. Meanwhile, sharp tools cut cleanly and damage stems less.
Collect Soil, Compost, and Mulch Early
Order compost and mulch before building day to avoid delays. Early delivery lets materials settle and stay ready for planting. Additionally, bulk compost often costs less than many small bags.
Store compost under cover so heavy rain cannot wash nutrients away. Covered piles stay workable and pleasant to handle. Similarly, dry mulch spreads easily and stays in place better.
Finally, gather seeds, transplants, and supports in one session. A single shopping trip prevents repeated trips and forgotten items. Check plant tags again before leaving the nursery or store.
Protect Plants From Pests and Weather
Use Gentle Pest Controls First
Handpick large pests during daily visits before populations grow. A strong water spray removes aphids from leaves without chemicals. Additionally, healthy plants resist pest damage better than stressed plants.
Encourage birds, ladybugs, and other beneficial creatures in your garden. Flowers, water, and shelter attract helpful wildlife naturally. Meanwhile, avoid broad sprays that harm beneficial insects too.
Finally, use row covers to shield young plants from insects and birds. Lightweight covers let light and rain reach plants below. Remove covers when flowers need pollinators for fruit formation.
Shield Plants From Wind and Frost
Wind dries soil quickly and snaps tender stems in exposed yards. Fences, hedges, and temporary screens reduce wind damage greatly. Additionally, sheltered beds retain moisture and warmth longer.
Watch weather forecasts during spring and autumn for frost warnings. Cover tender crops in the evening before temperatures fall. Meanwhile, remove covers in the morning after frost danger passes.
Mulch also insulates roots against sudden temperature changes. A steady root temperature helps plants recover from cold nights. Therefore, keep mulch in place through changeable spring weather.
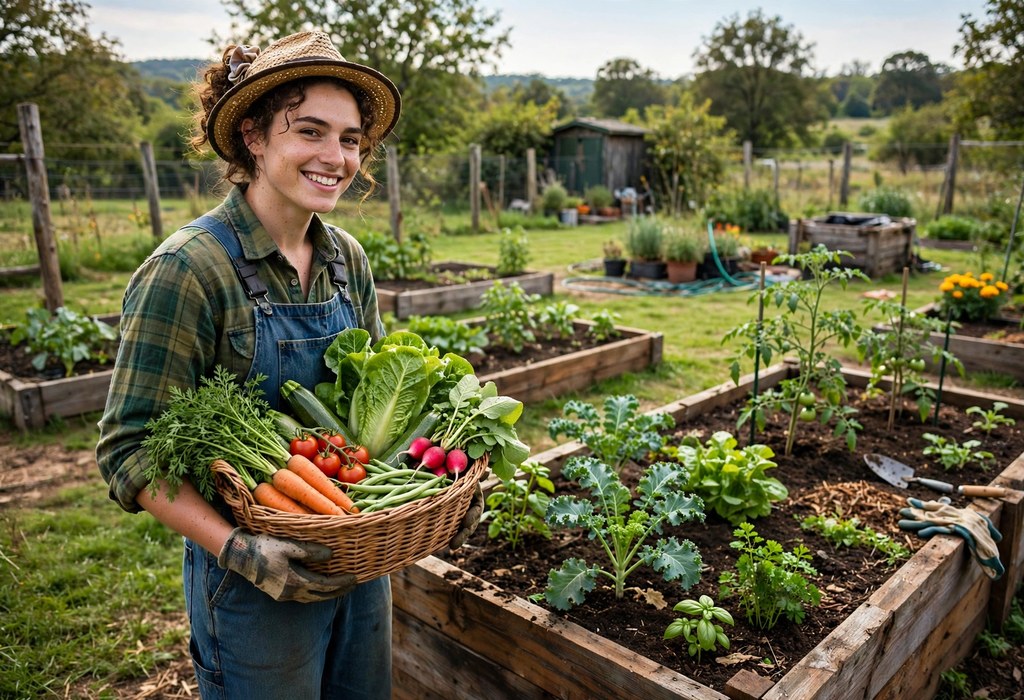
Harvest, Enjoy, and Learn
Pick Crops at Peak Flavor
Harvest leafy crops in the morning when leaves feel crisp and cool. Pick fruits regularly so plants keep producing new flowers. Additionally, frequent picking prevents overripe fruit and pest attraction.
Use clean scissors or snips for delicate herbs and leafy stems. Clean cuts heal faster and reduce disease entry points. Meanwhile, gentle handling keeps harvested produce fresh longer.
Taste crops soon after picking for the freshest flavor possible. Homegrown flavor often surpasses store produce noticeably. Finally, share surplus harvests with neighbors, friends, and family.
Record Lessons for Next Season
Note which crops thrived, struggled, or produced the best flavor. Record planting dates, spacing, and watering patterns too. Additionally, photos help you remember layouts and growth stages.
Review notes before planning the next bed or season. Past notes prevent repeated spacing mistakes and timing errors. Similarly, successful combinations deserve repeating in future beds.
Finally, rotate crop families to different beds each season. Rotation reduces soil disease and balances nutrient use naturally. Plan rotation early while this season layout remains fresh.
Follow a Simple Seasonal Rhythm
Prepare and Plant in Spring
Spring work begins with clearing winter debris and checking bed frames. Top up compost, repair edges, and loosen settled soil gently. Additionally, early weeding prevents weeds from seeding across beds.
Sow cool season crops first, then add warm season crops later. Staggered planting spreads harvests and reduces frost risk. Meanwhile, watch soil warmth closely before transplanting tender crops.
Finally, mulch new plantings once seedlings grow strong enough. Early mulch conserves spring moisture and suppresses emerging weeds. Keep mulch away from stems to prevent rot and pest shelter.
Maintain, Harvest, and Rest Beds
Summer care focuses on watering, weeding, and regular harvesting. Check moisture daily during heat waves and windy periods. Additionally, harvest promptly to encourage continued production.
Autumn offers time for cleanup, compost additions, and cover crops. Remove spent plants, add compost, and protect bare soil. Meanwhile, cover crops feed soil life through quieter months.
Winter rest lets soil life recover and organic matter break down. Avoid walking on wet beds during dormant months. Finally, use winter planning time to sketch improvements for spring.
Frequently Asked Questions
How do I start a garden bed for the first time?
Choose a sunny spot, clear the ground, enrich the soil, and plant suitable crops.
How much sun does a new garden bed need?
Most vegetables need six to eight hours of direct sunlight each day.
What is the easiest garden bed for a beginner?
A small raised bed offers controlled soil, good drainage, and easy access.
Can I start a garden bed directly on grass?
Yes, smother grass with cardboard, add compost, and plant into the compost layer.
How often should I water a new garden bed?
Water deeply whenever the top two inches of soil feel dry.
Start Your Garden Bed With Confidence
You now understand planning, location, soil, timing, and planting basics. Each step builds on the last and reduces guesswork for beginners. Additionally, small beds let you learn without overwhelming work or cost.
Begin this season with one sunny bed and a few reliable crops. Water deeply, weed lightly, and observe your plants every day. Finally, celebrate small harvests and record lessons for next season.
Take the first step today by sketching your bed and choosing its location. Then, gather compost, tools, and plants for a confident planting day. Your garden journey starts with one thoughtful bed and steady care.