You know the scene: you’re strolling through a garden center, captivated by the vast array of hostas. There are ones with leaves as blue as a summer sky, ones with margins so gold they seem painted by the sun, and others so massive they could double as garden umbrellas. You check the price tag on that unique, variegated specimen and let out a quiet sigh. What if you could unlock this diversity, not for $30 or $40 a plant, but for the price of a packet of seeds and a little patience?
Growing hostas from seed is a horticultural adventure, a foray into the secret, generative life of one of the world’s most beloved shade plants. It’s not the fastest method, and it comes with a fascinating caveat: surprise. But for the curious gardener, the thrill of creating something truly unique is unmatched. This comprehensive guide will demystify the process, equipping you with the knowledge to successfully cultivate your own hostas from tiny, papery seeds to lush, garden-ready plants.
Why Grow Hostas From Seed? Embracing the Unknown
Before we dive into the “how,” it’s crucial to understand the “why.” Unlike growing from divisions or bare roots, growing hosta plants from seed is an exercise in genetic lottery.
- The Thrill of Variation: Hostas do not grow true from seed. This means the seedlings from a single seed pod can exhibit a stunning range of characteristics different from the parent plant. A blue-leaved hosta might produce seedlings that are green, gold, or variegated. You are essentially playing the role of a plant breeder, selecting the most promising individuals from your own unique crop.
- Cost-Effectiveness: A single mature hosta can produce hundreds of seeds. For the price of one established plant, you can grow dozens, or even hundreds, of new ones to fill your shade garden or share with friends.
- The Ultimate Satisfaction: There is a profound sense of accomplishment in nurturing a plant through its entire life cycle, from a dormant seed to a mature, flowering clump. It’s a slow, meditative practice that deepens your connection to the garden.
Understanding the Hosta Lifecycle: From Flower to Seed Pod
To collect viable seeds, you need to understand the plant’s reproductive process. In mid to late summer, hostas send up scapes (flower stalks) adorned with bell-shaped flowers, typically in shades of lavender, white, or violet. These flowers are pollinated by insects, primarily bees. Once pollinated, the flower withers and a green, triangular seed pod begins to develop. These pods mature over several weeks, turning from green to a papery, tan or brown color. As they dry, they will eventually split open along three seams, revealing the black, papery seeds inside.
A quick FAQ: Can you harvest seeds from any hosta? Technically, yes. However, many modern, patented hybrid hostas are sterile and will not set viable seed. Furthermore, for seeds to be viable, the flowers must be cross-pollinated with pollen from a different hosta plant. A lone hosta in a garden is unlikely to produce seeds.
A Step-by-Step Guide to Growing Hosta Seeds
Patience is your greatest asset in this process. From seed sowing to a garden-worthy plant can take 3 to 5 years. But the journey is well worth it.
Step 1: Harvesting and Preparing Hosta Seeds
The first step is acquiring your seeds. You can purchase them from reputable online seed suppliers (this guarantees variety and viability) or harvest your own.
Harvesting Your Own:
- Timing is Everything: Watch the seed pods closely in late summer or early fall. The goal is to harvest just before they split open naturally.
- The Test: Gently squeeze a brown, dry pod. If it cracks open easily, it’s ready.
- Collect: Snip the entire scape or individual pods and place them in a paper bag. Label the bag with the parent plant name if known.
- Extract: Let the pods dry completely in the open bag for a week or two. Then, crush the pods to release the seeds. Winnow away the chaff by gently blowing on the seeds or using a fine sieve.
Seed Preparation (The Key to Success):
Hosta seeds have a physiological dormancy that requires a period of cold, moist conditions to break—a process called cold moist stratification. Skipping this step will result in poor or nonexistent germination.
- Place your clean seeds in a damp (not wet) paper towel or a handful of moistened peat moss or vermiculite.
- Seal them in a plastic zip-top bag or airtight container.
- Label the bag with the date and variety.
- Place the bag in the refrigerator (not the freezer) for 4-6 weeks. This mimics a natural winter, signaling to the seed that it’s safe to germinate come spring.
Step 2: Sowing and Germination
The ideal time to sow your stratified seeds is in late winter, about 8-10 weeks before your last expected frost date. This gives the seedlings a long head start.
What You’ll Need:
- A clean seed tray or small pots with drainage holes
- A high-quality, sterile seed-starting mix (do not use garden soil, as it harbors fungi that cause damping-off disease)
- A spray bottle for watering
- A clear plastic dome or plastic wrap
- A warm, bright location (like under grow lights)
The Process:
- Fill and Moisturize: Fill your containers with the pre-moistened seed-starting mix. Press it down gently to eliminate large air pockets.
- Sow: Since hosta seeds are relatively large, you can handle them individually. Sow 2-3 seeds per cell or scatter them lightly on the surface, spacing them about an inch apart.
- Cover Lightly: Hostas need light to germinate, so only press the seeds gently into the soil surface or give them a very light dusting of fine vermiculite—no more than 1/8 of an inch. This helps maintain moisture contact without blocking light.
- Create Humidity: Mist the surface thoroughly with your spray bottle. Cover the tray with a plastic dome or plastic wrap to create a mini-greenhouse effect, which maintains consistent humidity—a critical factor for hosta seed germination.
- Provide Warmth: Place the tray in a warm location (65-75°F or 18-24°C is ideal). Bottom heat from a seed-starting mat can accelerate germination.
- Wait and Watch: Germination can be erratic, taking anywhere from 2 to 6 weeks. Keep the soil consistently moist but not waterlogged. Condensation on the dome is a good sign.
Step 3: Seedling Care and The All-Important “Weed Out”
Once you see the first green loops emerge, it’s time to act.
- Remove the Dome: Take off the plastic cover to allow for air circulation and prevent fungal diseases.
- Provide Light: Move the seedlings to a very bright location. A south-facing window might suffice, but for stocky, healthy growth, grow lights are highly recommended. Keep the lights just a few inches above the seedlings for 12-16 hours a day.
- Water Carefully: Continue to water from below by placing the tray in a shallow dish of water, or use a spray bottle to gently moisten the soil. Avoid pouring water directly on the fragile stems.
- The Thinning Process: If multiple seeds germinate in one cell, you must thin them. Snip the weaker, smaller seedlings at the soil level with tiny scissors, leaving the strongest one to grow. This prevents competition for light and nutrients.
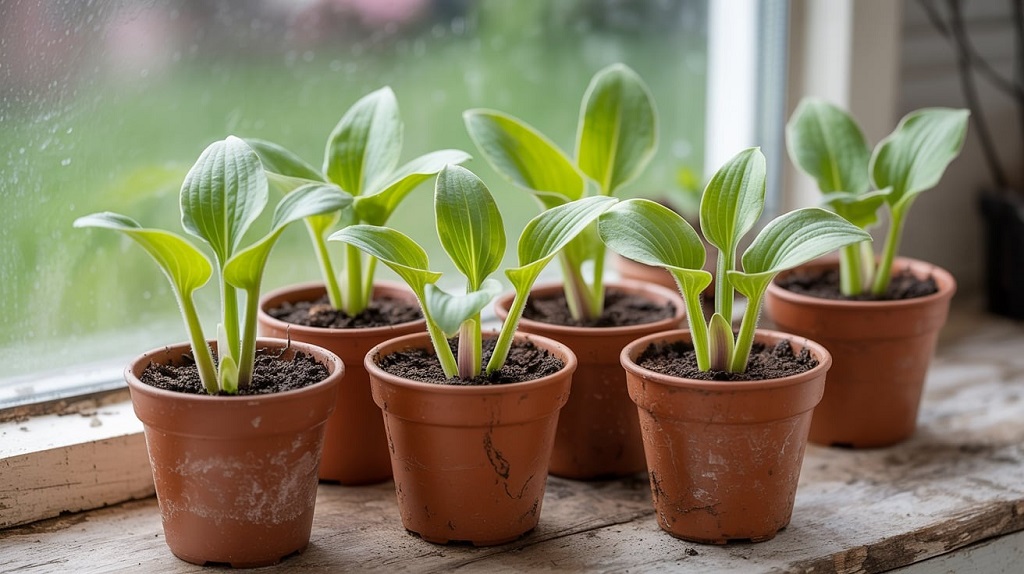
Step 4: Potting On and Growing On
After the seedlings have developed their first set of true leaves (which look like proper hosta leaves, following the initial seed leaves or cotyledons), they are ready for their own pots.
- Transplant: Gently lift the seedlings using a small tool like a dibber or a spoon. Handle them only by their leaves, not their delicate stems.
- Pot Up: Plant each seedling into a small 3-4 inch pot filled with a well-draining potting mix.
- Continue Care: Keep them under grow lights or in a very bright, protected location. Water when the top inch of soil feels dry and begin fertilizing every two weeks with a diluted, balanced liquid fertilizer (half-strength is plenty).
Read More Also: How to Grow Houseplants in Low Light Conditions
From Indoor Start to Outdoor Shade Garden
Your hosta seedlings will need to spend their first summer growing strong indoors or in a protected cold frame. They are far too tender to go directly into the garden.
Hardening Off: In the following spring, after all danger of frost has passed and your seedlings are a year old, you must acclimate them to outdoor conditions. This process, called hardening off, involves placing the pots in a shaded, sheltered spot outdoors for a few hours each day, gradually increasing their time outside over 7-10 days.
Planting Out: Choose a prepared garden bed with rich, well-draining soil amended with compost. Remember, hostas are shade tolerant plants but most thrive in dappled shade or morning sun. Dig a hole as deep as the root ball and twice as wide. Place the plant in the hole, backfill, water deeply, and apply a layer of mulch to conserve moisture.
The Long Game: Now, the final test of patience begins. It will take another 2-4 years for your seedling to mature into a full, characteristic clump. During this time, continue to provide adequate water (especially in the first year), and protect the young plants from slugs and snails, their primary pests.
Read More Also: How Long After Pest Control Do Bugs Die?
The Reward of Patience
Growing hostas from seed is not for the gardener seeking instant gratification. It is a project, a multi-year commitment that unfolds slowly. But in that slowness lies its magic. You will watch with pride as the leaves you grew from a speck of life unfurl in your garden, each one a unique masterpiece created through your care. You’ll never look at a hosta—or its humble seed pod—the same way again.