The first hard frost leaves you staring at blackened tomato vines and collapsed bean poles, and the temptation is to shut the gate until spring. Knowing how to clean up vegetable garden for winter turns that chore into a few focused weekends of work. Done right, it cuts pest and disease pressure next season and leaves your soil ready to plant earlier.
Quick answer: Clear all spent plants and fallen fruit, pull weeds before they seed, and remove debris from beds and paths. Then test and amend the soil, plant a cover crop or spread mulch, and clean, sharpen, and store your tools. Timing matters most: finish well before the ground freezes so disease spores do not settle into the soil.
This guide walks through tools, an ordered set of steps, practical tips, and the mistakes that undo good work. You will finish with a garden that overwinters clean and a clear plan for spring.
What you need before starting
Gather supplies first so a cold afternoon does not stall halfway through. Most items are already in a shed or cost little at a garden center.
Tools for clearing and cutting:
- Bypass pruners and loppers for tough stems
- A sharp spade or digging fork for roots and root crops
- A stiff rake and a hand cultivator
- A wheelbarrow or tarp for hauling debris
- Heavy gloves and knee protection for kneeling work
Supplies for soil and protection:
- A soil test kit or a lab sample bag
- Compost, aged manure, or a balanced organic fertilizer based on test results
- Cover crop seed such as winter rye, crimson clover, or hairy vetch
- Straw, shredded leaves, or compost for mulch
- Garden lime or sulfur only if a test calls for it
Storage and cleanup items:
- Lidded bins or a compost system that handles diseased material
- A bucket of warm soapy water and a cloth
- Rubbing alcohol or a disinfectant for blades
- A file or sharpener for pruners and spades
- Label stakes and a notebook for next year’s crop plan
Check the weather forecast and pick a stretch of dry days. Working wet soil compacts it, and cleaning up in the rain spreads disease from plant to plant on your gloves and tools. If your beds are large, plan two or three sessions rather than one exhausting push.
Most cleanup should finish within two to three weeks of your first expected frost. Root crops and hardy greens can stay longer with row cover, but diseased foliage should go as soon as it appears.
Step-by-step instructions

Work in this order. Each step builds on the one before, and the sequence keeps debris from recontaminating cleaned beds.
- Harvest everything still usable. Pick the last tomatoes, peppers, and root crops before hard frost. Green tomatoes ripen indoors on a tray, and carrots and parsnips can stay in the ground under a thick straw mulch for fresh winter digging. Remove any fruit left on the ground.
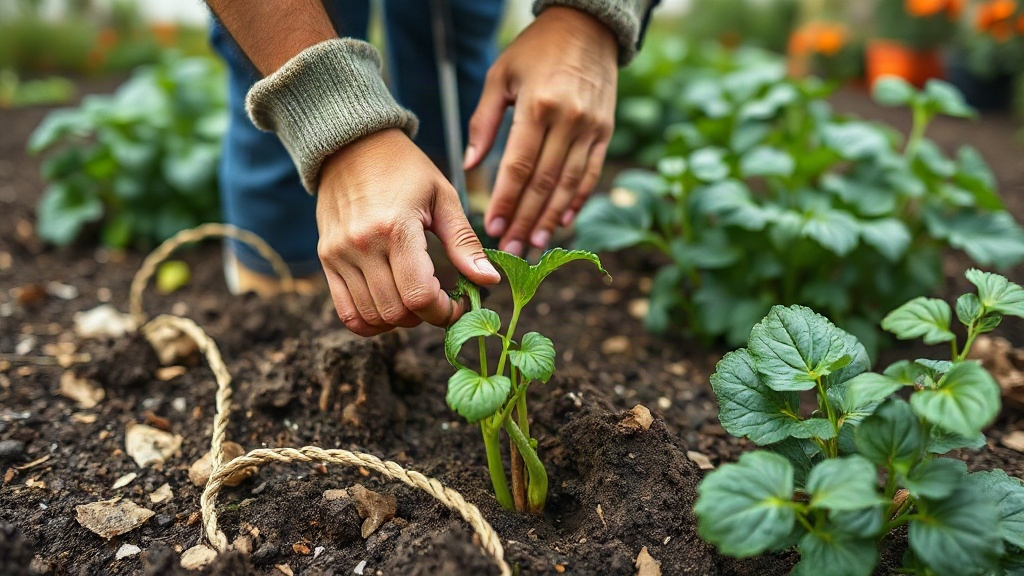
- Pull spent annual plants by the roots. Tomato, pepper, cucumber, and squash vines come out whole, roots included. Shake soil off the roots back into the bed, then bag the tops. Shred healthy material for compost; bag anything with spots, mold, or wilt.
- Cut back perennials and herbs. Trim asparagus ferns, rhubarb stalks, and perennial herbs to a few inches above the crown once they die back. Leave woody herbs like rosemary and thyme with some top growth for insulation in cold zones.
- Remove stakes, cages, and trellises. Knock soil off supports and stack them somewhere dry. Clean strings and ties or replace them. This step also exposes pests hiding in the frames.
- Weed thoroughly and remove roots. Pull or dig every weed, including chickweed and bittercress that germinate in cool weather. A single overwintered weed can scatter thousands of seeds by spring, so get the roots.
- Clear paths and bed edges. Sweep leaves and plant debris off gravel, wood chips, and edging. Debris on paths shelters slugs and overwintering insects that return to beds later.
- Test and amend the soil. Take samples from several spots per bed, mix them in a clean bucket, and send or test the sample. Add compost and any lime or fertilizer the results recommend, then work it into the top few inches.
- Plant a cover crop or mulch bare soil. Sow winter rye, clover, or vetch in empty beds at the seed rate on the package. Beds you plan to plant early get a thick layer of straw, leaves, or compost instead.
- Clean and store tools. Wash soil off shovels, forks, and pruners, dry them fully, and wipe metal with a light oil. Sharpen blades and disinfect pruners between plants if you cut anything diseased.
- Record what happened. Sketch each bed, note what grew and what struggled, and list changes for rotation. This note saves guesswork when seed catalogs arrive in January.
Digging or tilling saturated ground creates hard clods that take seasons to repair. Wait until soil crumbles in your hand rather than smearing.
Tips for better results
Small choices during cleanup pay off across the next growing season. These habits separate a tidy garden from a genuinely healthy one.
Sort waste by risk, not convenience. Diseased tomato and potato foliage, mildewed squash leaves, and moldy fruit should leave the property or go into a hot compost pile that reaches high internal temperatures. Healthy stems, leaves, and kitchen scraps can go into a regular bin. Keeping these streams separate stops you from spreading last year’s blight back onto next year’s beds.
Chop coarse material before composting. Run woody stems and thick vines through a shredder or cut them into short lengths with pruners. Smaller pieces break down faster and create a more even compost pile. Turn the pile a few times before spring and keep it as moist as a wrung-out sponge.
Choose a cover crop that matches your spring plan. Winter rye survives cold well and produces plenty of organic matter, but it needs to be cut and turned in early because it grows fast in spring. Crimson clover and hairy vetch fix nitrogen and winter-kill in colder zones, which makes them easier to manage before early planting. Match the crop to when you need the bed back.
Plant garlic in a cleaned bed. Garlic goes in during fall and rewards you with a crop the following summer. Set cloves pointed end up about two inches deep and mulch heavily. A clean, amended bed gives garlic a strong start and uses space that would otherwise sit idle.
Make cleanup double as a pest trap. Leave a few overturned boards or shingles near bed edges. Slugs and some insects shelter under them, and you can remove and deal with them on a cold morning. Check weekly until the ground freezes.
Protect soil structure with mulch depth. Aim for two to four inches of straw or leaves on bare beds. Deeper mulch can smother early spring growth, and too little leaves soil exposed to winter rain and erosion.
Photograph each bed before you clear it and note which pests or diseases appeared. The photos are a better record than memory when you plan crop rotation in winter.
Common mistakes to avoid
Most winter cleanup problems come from a handful of recurring habits. Recognizing them now saves a season of frustration.
Leaving diseased plants in place. Fungal spores and bacteria overwinter on dead foliage. Leaving blighted tomato vines on the soil almost guarantees a repeat outbreak. Remove and dispose of them properly.
Composting everything together. A cool backyard pile rarely gets hot enough to kill pathogens or weed seeds. Keep diseased material and seeding weeds out of it, or accept that you may spread problems later.
Skipping the soil test. Adding lime or fertilizer by habit can push pH or nutrients out of balance. A test costs little and tells you exactly what the bed needs.
Cleaning up too late. Debris left into winter gives pests and diseases more time to settle in. Aim to finish shortly after the first frost and before the ground freezes hard.
Forgetting the paths and fences. Weeds and pests hide along edges and under fences. Ignoring these strips undoes clean beds quickly.
Storing tools dirty and dull. Soil left on blades causes rust, and dull pruners crush stems instead of cutting them. A few minutes of care protects the investment.
Tilling everything out of habit. Frequent tilling damages soil structure and brings buried weed seeds to the surface. Dig only where needed and let mulch and cover crops do the rest.
FAQ
What is the best time to clean up a vegetable garden for winter?
Start right after the first hard frost, when annual plants die back. Finish before the ground freezes solid, usually within two to three weeks. Hardy crops can stay longer under row cover.
Can I leave roots in the ground over winter?
Yes, for many crops. Leaving roots of beans, tomatoes, and similar plants adds organic matter, but remove roots of diseased plants. Root crops like carrots can overwinter under deep mulch.
Do I need to plant a cover crop in every bed?
No. Cover crops help bare beds most. If you plan to plant early, mulch may suit you better because cover crops need time to break down in spring.
What should I do with the leaves that fall on the garden?
Shred them and use them as mulch or add them to compost. A layer of leaves protects soil and suppresses early weeds. Avoid thick mats that smother the soil surface.
How do I stop pests from overwintering in the garden?
Remove debris, clean paths, and eliminate hiding spots like boards and old stakes. Turning soil lightly where pests are known to pupate can also help.
A focused fall cleanup is the cheapest pest and disease control you will ever do. Two solid afternoons in late fall beat a season of spraying in summer.
Conclusion
Successful winter preparation follows a clear order: clear plants and debris, weed thoroughly, amend the soil, and protect bare ground with cover crops or mulch. Clean, sharp tools and a written record finish the job and set up your rotation plan. The how to clean up vegetable garden for winter work is mostly about timing and separation of healthy and diseased material.
Pick a dry weekend after your first frost and start with the worst bed. Clear it fully, amend it, and cover it before moving to the next. You will open spring with healthy soil and far less to do.